In this blog, you will learn how to design AWS Data Pipelines in StreamSets Data Collector, a fast data ingestion engine, that you can then use to impress your boss with in 2021 — the year of the data engineer!
Migrate An On-Prem Oracle Database to AWS Aurora RDS
Consider the use case where you have a legacy data warehouse (Oracle) that you would like to migrate to AWS. Your boss has requested that you migrate this to AWS Aurora RDS for operational and cost reasons. However, data tables are still constantly being updated in your on-premise Oracle data warehouse and you want to be able to extract not only the existing historical data, but also process change data capture (CDC) records in real-time and store those in AWS Aurora RDS.
To demonstrate this, we will review 3 data pipelines that will enable you to automate this dataflow.
Prerequisites and Assumptions
- Download JDBC driver for Oracle and Aurora (MySQL)
- Upload drivers to Streamsets Data Collector
- The Oracle’s LogMiner is enabled. LOG_MODE should be ARCHIVELOG. Check it by executing the query as a DBA user.
- SELECT log_mode FROM v$database;
- Oracle’s Supplemental logging is enabled. Supplemental logging can be of three types: minimum for the database, identification key and full. These can be set on a table or a database level. The easiest way is to enable the logging for the database, which can be checked with by running this query:
- SELECT supplemental_log_data_min, supplemental_log_data_pk, supplemental_log_data_all FROM v$database;
- A user account with the required privileges is created. For standard Oracle 12c databases, execute the following statements as a DBA user:
- CREATE USER streamsets IDENTIFIED BY streamsets123456;
- GRANT create session, alter session, select any dictionary, logmining, execute_catalog_role TO streamsets;
- You need an AWS account and have access to AWS RDS
- StreamSets Data Collector must have access to the On-Premise Oracle data warehousesystem and AWS RDS Aurora instance
Let’s start by setting up our source and destination databases.
Setup Oracle Database
Let’s create a minimal pipeline that creates and loads randomly generated customer data into an Oracle table called CUSTOMER.
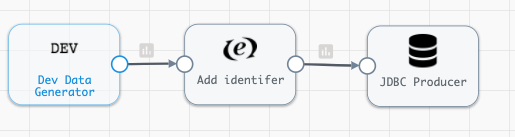
Now, let’s create a table in Oracle by executing the following:
- CREATE TABLE SS.CUSTOMER (ID NUMBER(15) PRIMARY KEY, NAME VARCHAR2(30), ADDRESS VARCHAR2(50), CITY VARCHAR2(50), STATE VARCHAR2(25), COLOR VARCHAR2(20));
- GRANT select on SS.customer TO streamsets;
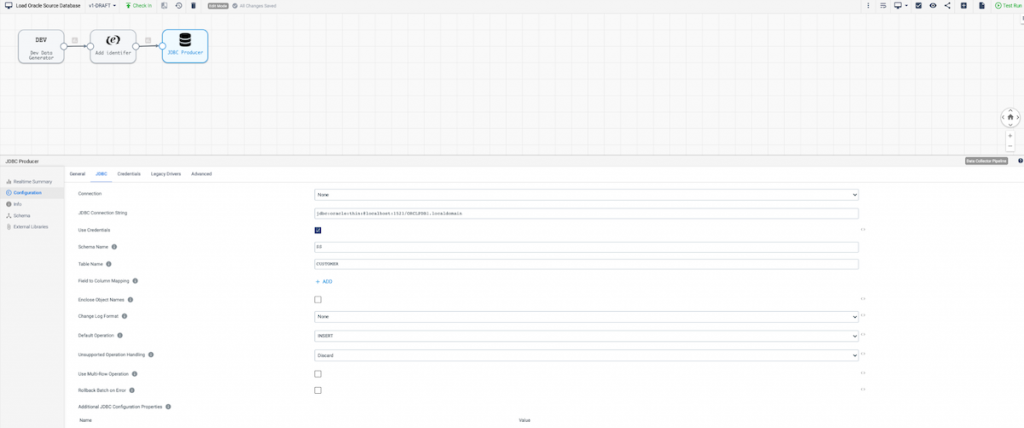
Now make sure to configure your JDBC Producer as shown below.
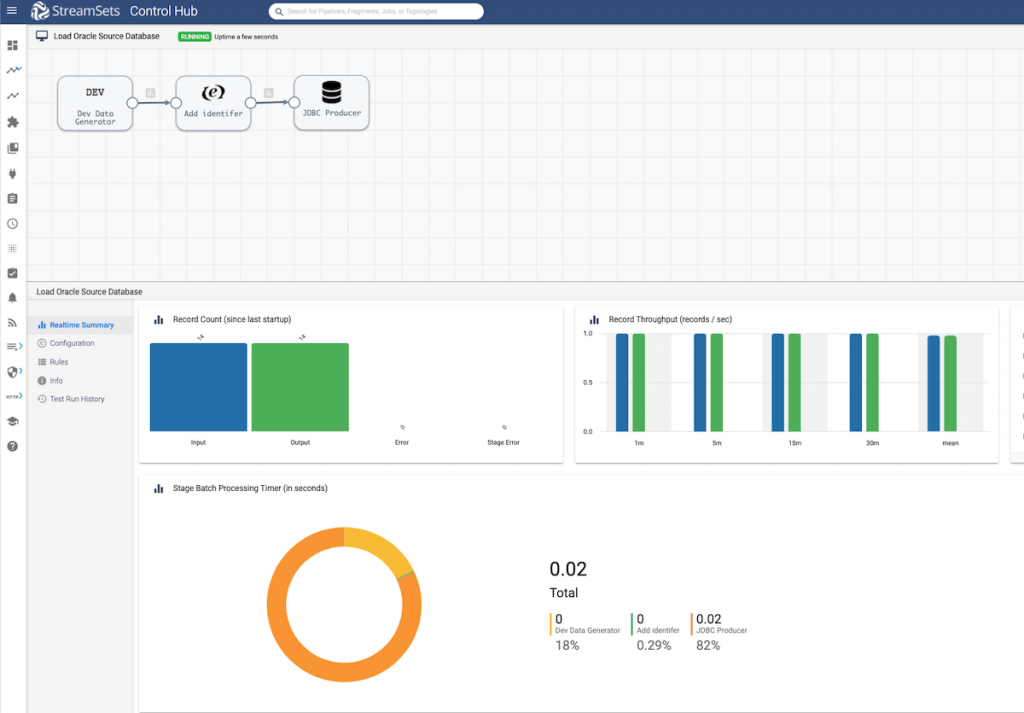
Pipeline Execution
You can now start the data pipeline and see data flowing into the CUSTOMER table.
Configure AWS RDS Aurora (MySQL) Destination
Now let’s connect to the Aurora database and create the CUSTOMER table for replication by executing the following.
- USE retail;
- CREATE TABLE customer (
ID INT(11),
`NAME` VARCHAR(30),
ADDRESS VARCHAR(50),
CITY VARCHAR(50),
STATE VARCHAR(25),
COLOR VARCHAR(20),
PRIMARY KEY (ID)
);
Now that we have an Oracle table consistently getting data streaming to it, we can dive into data pipelines that allow for full migration to AWS RDS Aurora.
Note: MySQL can be used as an origin as well; for example syncing your MySQL file updates with Snowflake.
Data Pipeline 1: Oracle to AWS RDS Aurora
The first data pipeline we will need to create will load all historical data from Oracle tables.
Pipeline Overview
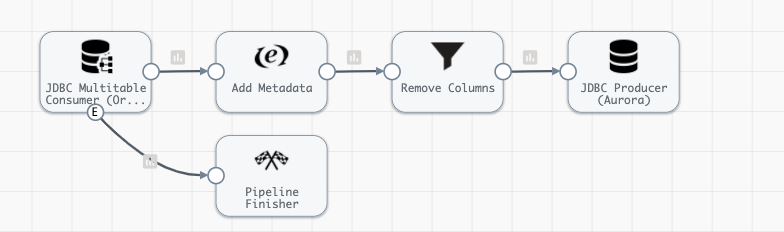
The JDBC Multitable Consumer Origin configuration looks something like this.
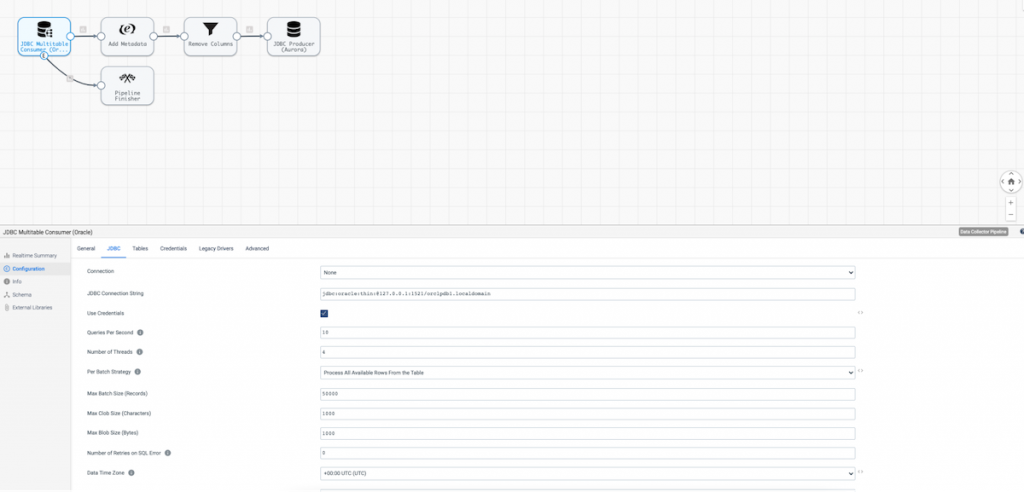
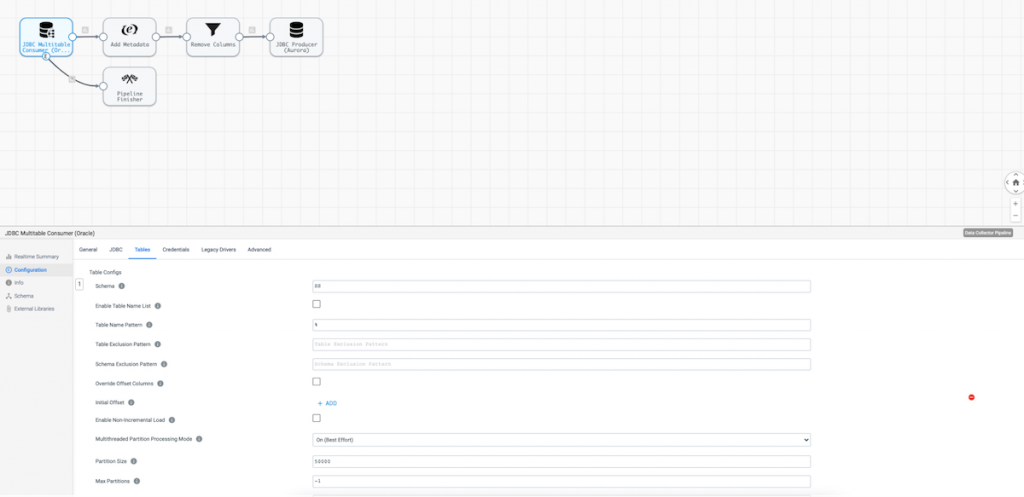
Note that I’ve configured the origin to ingest data from the entire schema ‘SS’ and all tables under that schema via a % wildcard.
Pipeline Preview
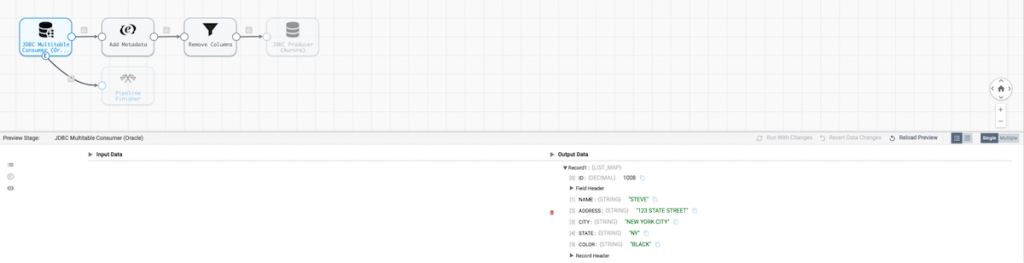
Let’s run a preview of the data to examine what our Oracle data looks like.
Now that we have a good idea of the CUSTOMER table, let’s use an Expression Evaluator to generate a couple of metadata columns (LOAD_DATE and DELETED) and rerun the preview to examine the updates.
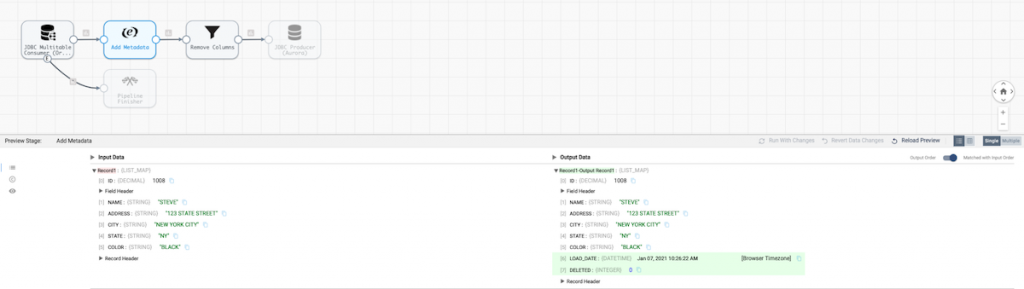
We can see the added columns above.
JDBC Producer
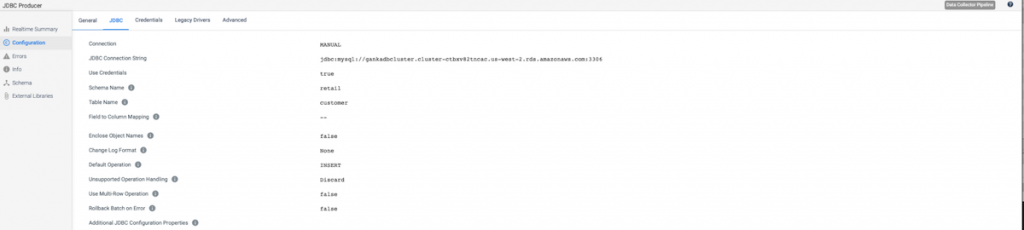
Let’s review how the JDBC Producer is configured to connect to AWS RDS Aurora.
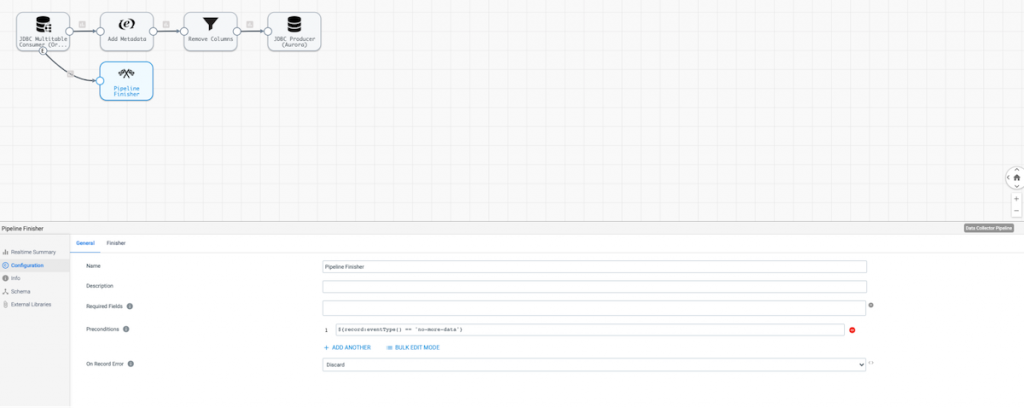
Pipeline Finisher
Lastly, configure a Pipeline Finisher to ensure the pipeline runs in batch mode as opposed to streaming mode. Note the configuration below where the Precondition field is set to ${record:eventType() == ‘no-more-data’}
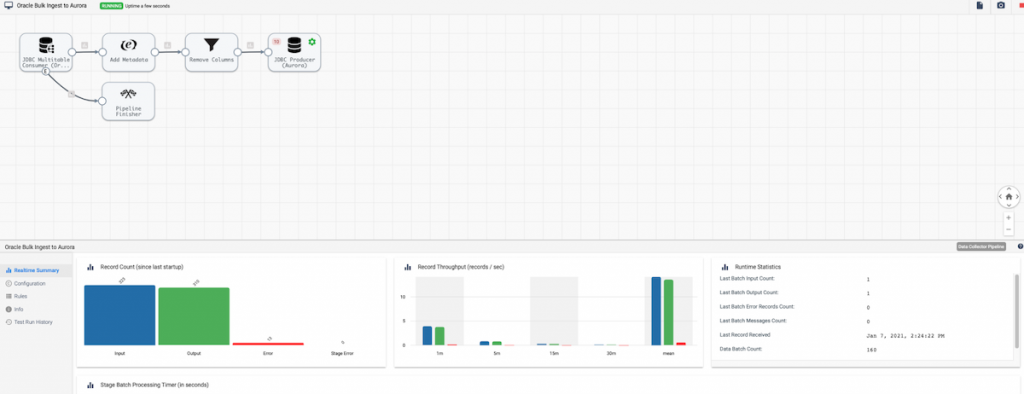
Pipeline Execution
Now start the pipeline and see the batches of data start to flow in.
You have now set up a data pipeline to ingest data from Oracle to AWS RDS Aurora that will perform a one time historical load.
Next step is to design a change data capture (CDC) pipeline to run after this pipeline.
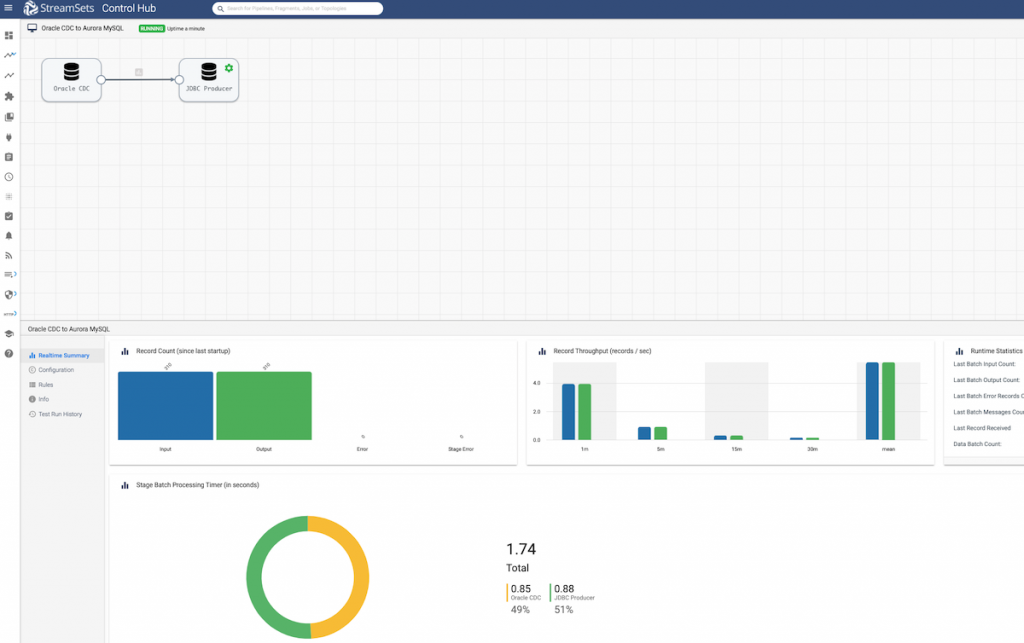
Data Pipeline 2: Oracle Change Data Capture to AWS RDS Aurora
Pipeline Overview
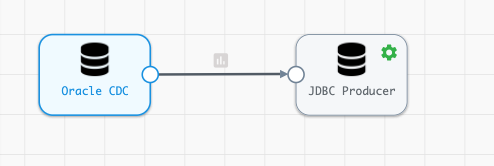
The Oracle CDC Client Configuration should look similar to this.
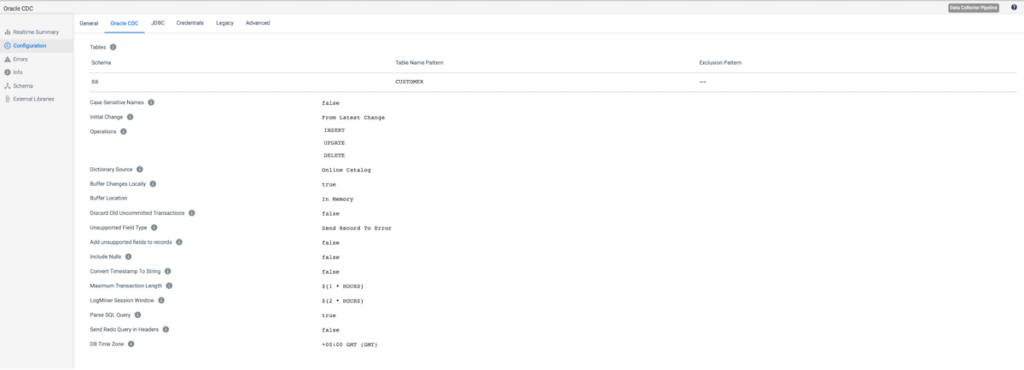
In Oracle CDC configuration tab shown above we need to specify the following parameters:
- Source table Schema and Table Name Pattern (with a SQL-like syntax).
- Starting processing point with the Initial Change parameter. It has three possible values:
- From the latest change – Process all changes that occur after you start the pipeline.
- From a specified datetime – Process all changes that occurred at the specified datetime and later.
- From a specified Oracle’s system change number (SCN) – Process all changes that occurred in the specified SCN and later.
- The list of operations that should be captured as records in Operation parameter.
- Notice that the DB Time Zone is set to GMT. To check out what timezone your Oracle DB is in run the following command in Oracle.
- SELECT DBTIMEZONE FROM DUAL;
Configure JDBC Producer similar to the previous pipeline, but point to your AWS RDS Aurora instance as shown below.
Pipeline Execution
Now start the pipeline and see the changes roll into Aurora.
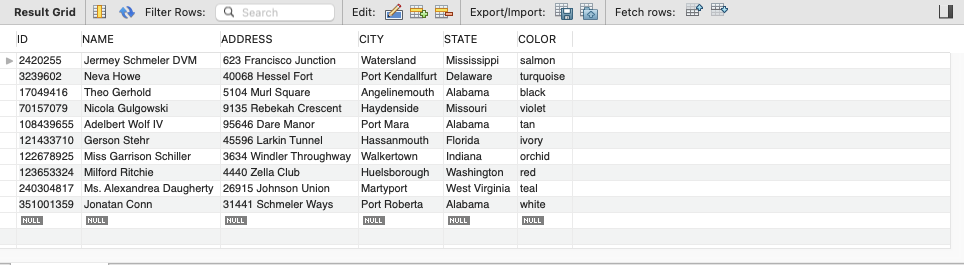
Preview the data in Aurora by executing SELECT * FROM customer LIMIT 10;
Data Pipeline #3: Orchestration
Pipeline Overview
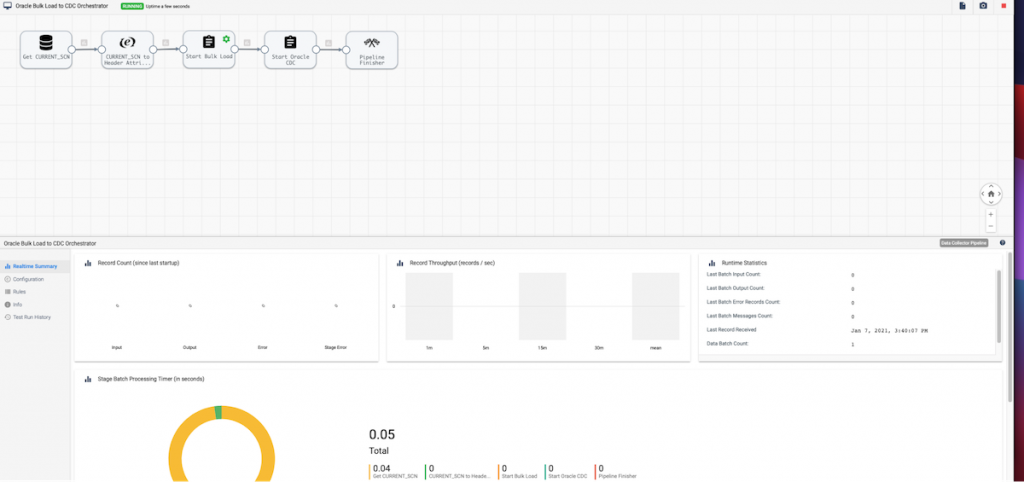
We were able to create two AWS data pipelines feeding data from our legacy on-premise Oracle data warehouse to AWS RDS Aurora. The final ingredient needed to tie this migration together is orchestration. The below example queries Oracle to find the latest SCN needed for tables in a schema. This is used for the Oracle CDC pipeline to know the exact location it should start pulling in changes from. Let’s take a look:

First, we start by using the JDBC Query Consumer origin to get the Current SCN from Oracle using SQL query SELECT CURRENT_SCN FROM v$database as shown below.
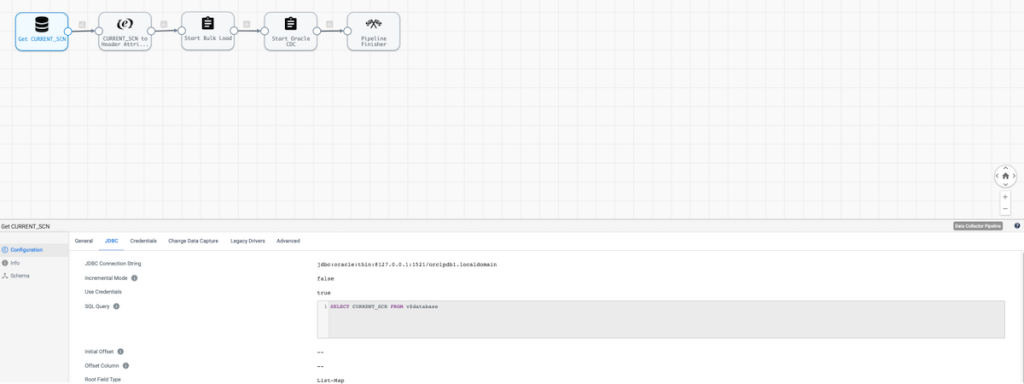
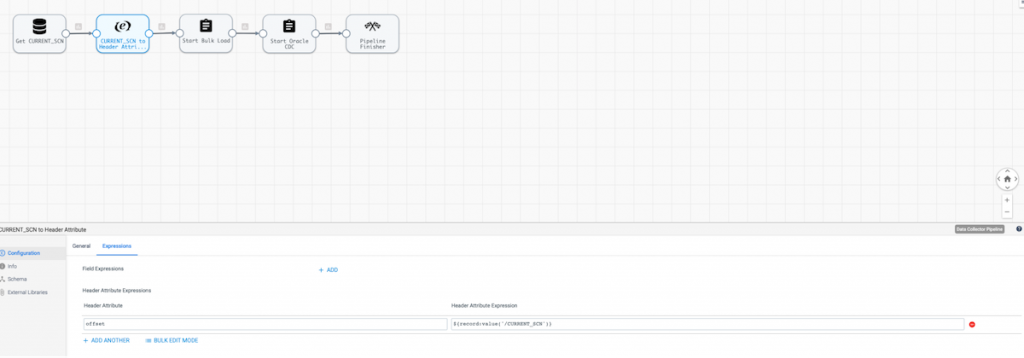
Next, we’ll I use an Expression Evaluator to set the CURRENT_SCN into a header attribute. This is so it can be passed as the initial SCN for the Oracle CDC job (Start Job Processor).
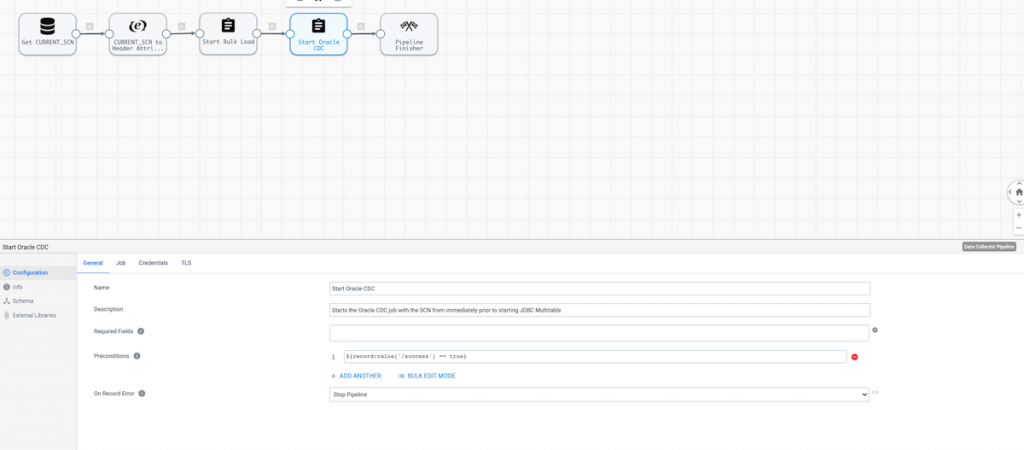
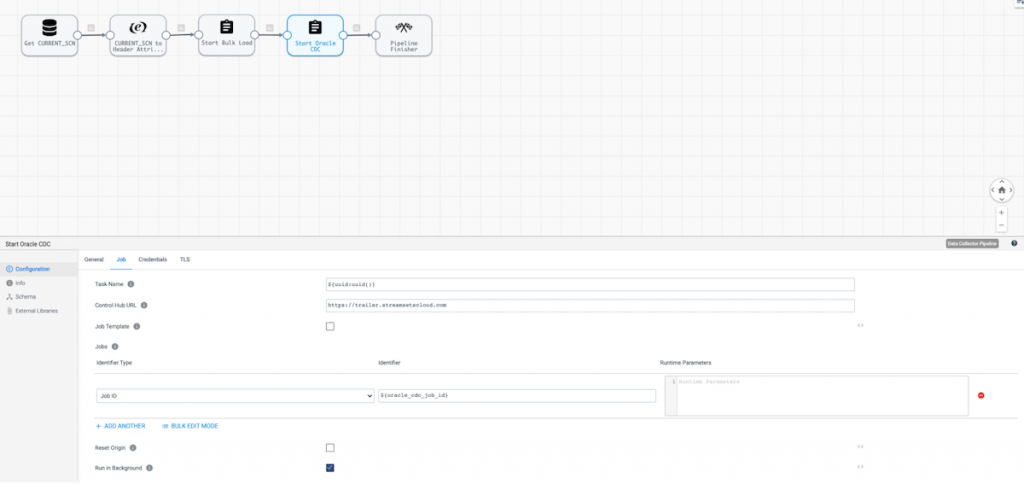
Then we’ll use the Start Jobs processor to kick off the Oracle Historical Load job. If that runs successfully, then the Oracle CDC job will start after it. Note the configuration below.
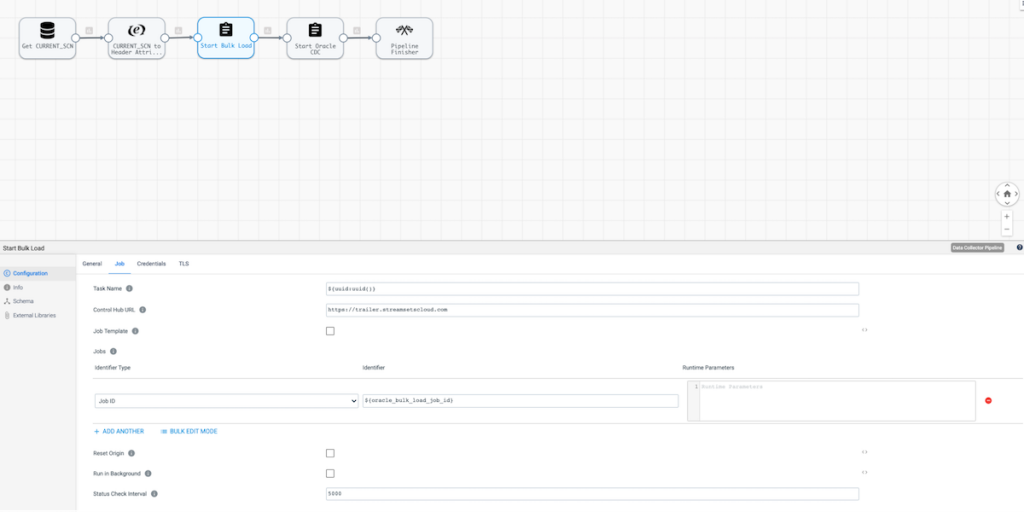
Note that the second Start Job Processor has a Precondition set to ensure the CDC job only runs if the previous job was successful.
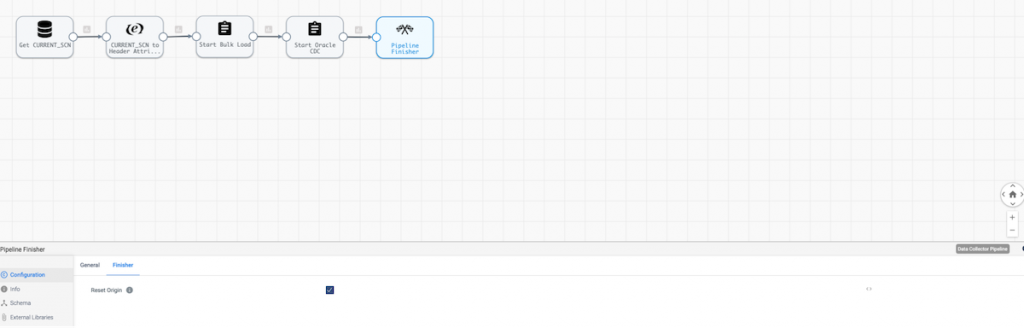
Finally the Pipeline Finisher stops the orchestration job and resets the origin offset for the pipeline.
Pipeline Execution
Conclusion
In this post, we reviewed how to design AWS data pipelines in StreamSets Data Collector to orchestrate and automate offloading on-prem database to the cloud while keeping the ongoing changes in sync between the source and destination using Change Data Capture.
Here are some other helpful resources to jump start your journey to the cloud:
- StreamSets for Amazon Web Services
- Getting started videos for building data pipelines
- Bulk ingest Salesforce Data Into Databricks Delta Lake
- Oracle 19c Bulk Ingest And Change Data Capture Into Databricks Delta Lake
Now go impress your boss! :)