Get Started With The Latest Capabilities And Unlock New Use Cases
There are lots of tools for quick bulk replication to the cloud, but rarely does your journey end there. How do you keep that data current in the cloud while the data and its source systems are constantly evolving? Frequently full replications on a large data set are impractical and inefficient. Fortunately, StreamSets offers powerful Change Data Capture (CDC) capabilities to ensure that your Snowflake Data Cloud is always up to date. StreamSets Platform supports many types of CDC processes and integrates with databases such as Postgres, MySQL, and Oracle.
In this blog, you will learn to ingest continuous Postgres data (CDC) from Amazon RDS to Snowflake. To start, we will set up two pipelines that will
- Populate a sample data set
- Generate updates to that data to simulate a scenario with CDC. Finally, we will create the CDC pipeline and see how we can save the logic in the stages to a reusable pipeline fragment.
Prerequisites
- RDS Postgres instance
- Version 11.x or greater
- Logical replication is enabled
Connection for Amazon RDS Postgres
First, let’s create a new connection to your Postgres Database. You can click the Connections tab and Create a Connection.
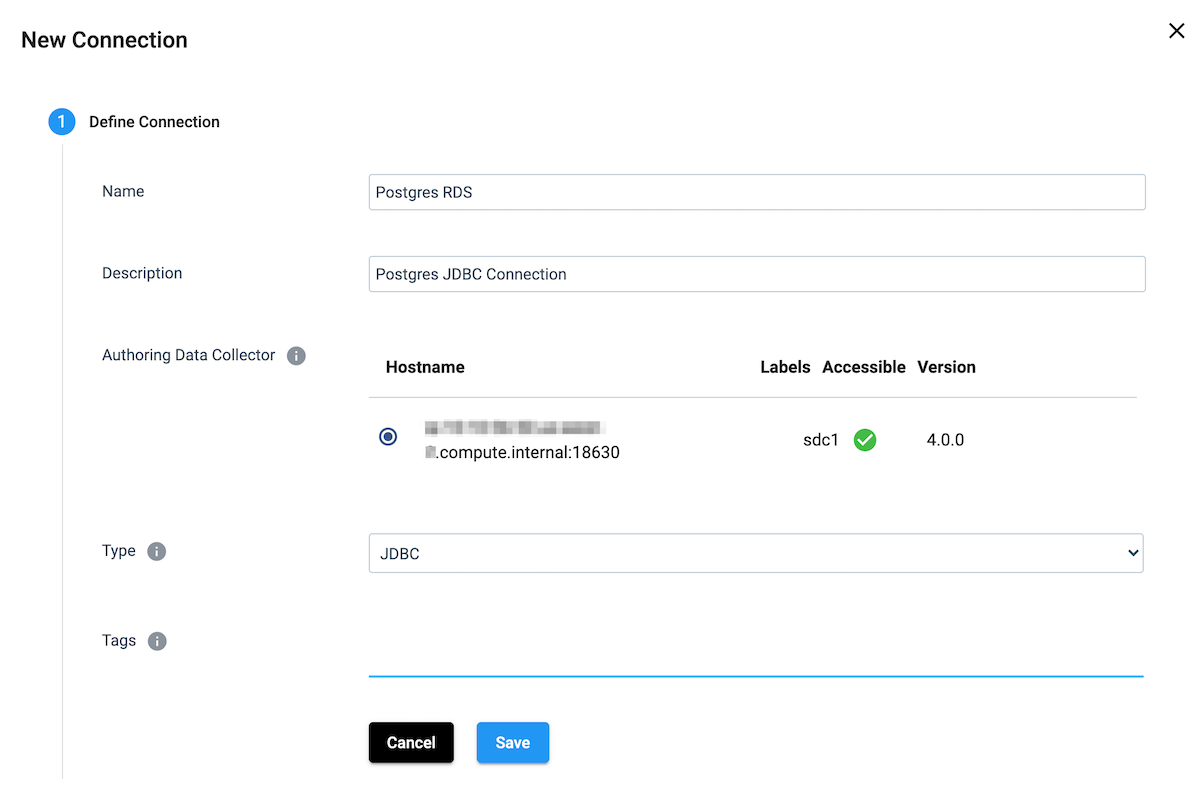
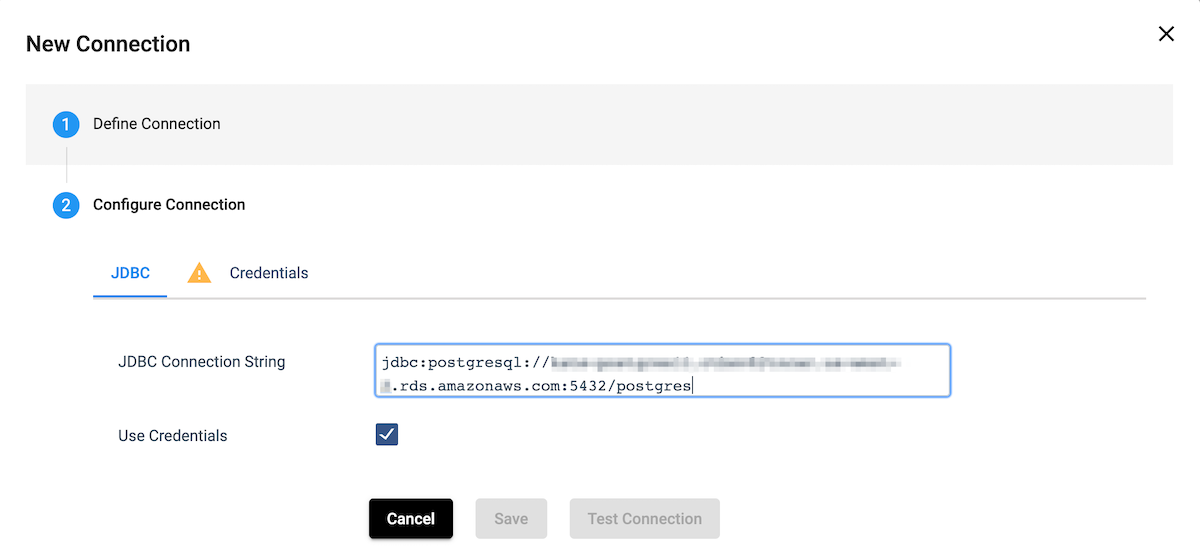
Configure the Connection: Give your new connection a name and description, select the Authoring Data Collector, and select JDBC as the Type. Save.
 You can find your RDS endpoint and port information by logging into the AWS Console and selecting your instance.
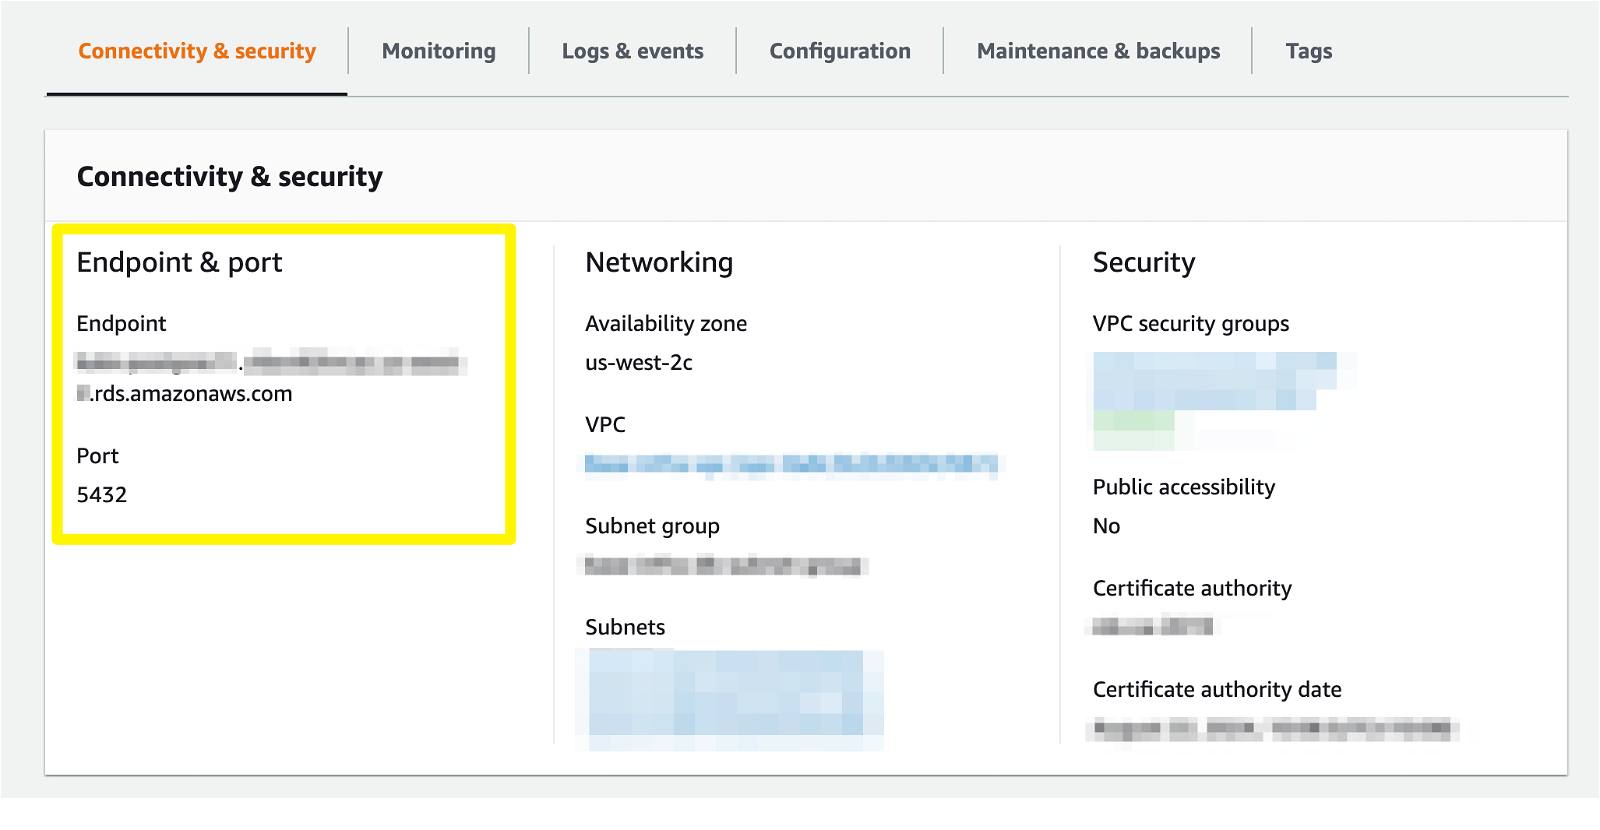 Add this information into the JDBC Connection String, and enter your credentials. Test the connection to verify the credentials and endpoint are correct, and save the connection.
 Connection for Snowflake
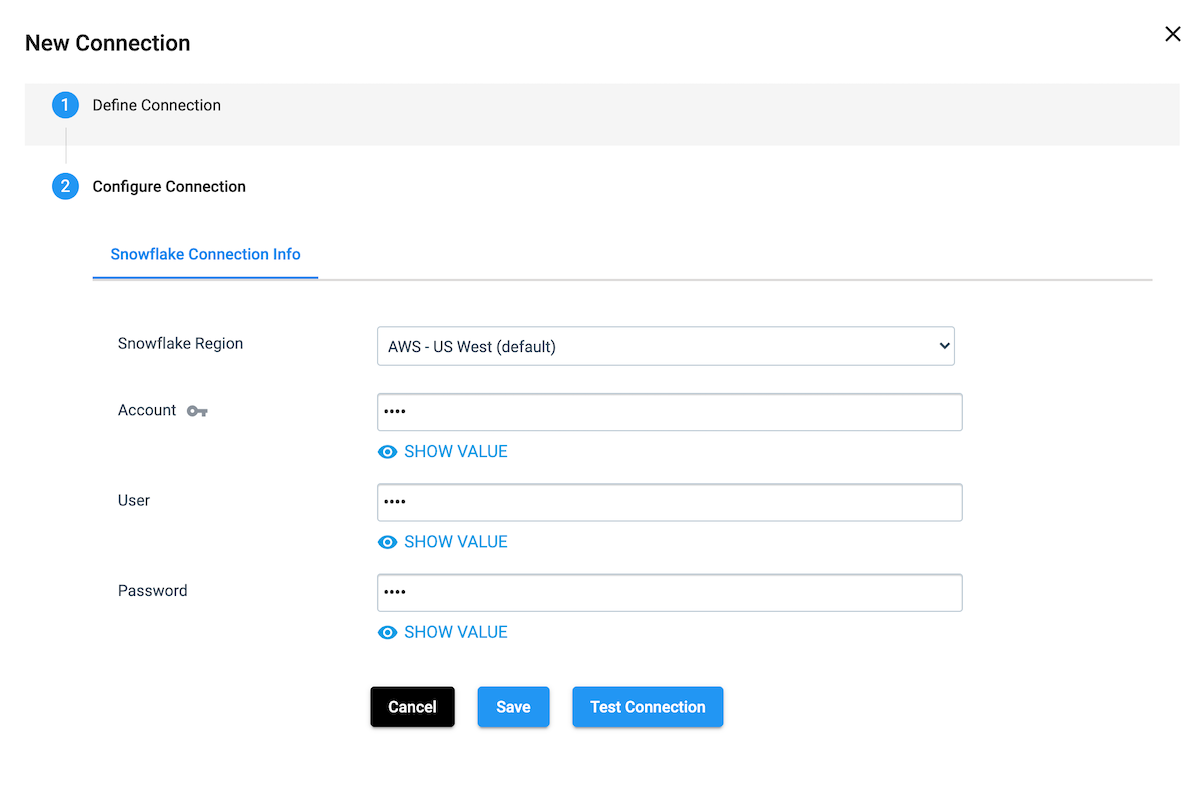
Follow the instructions for creating a Postgres JDBC connection, except choose Snowflake as the connection type. Enter your region, account, and credentials; test and save the connection.
 Now we are ready to create our pipeline from Postgres to the Snowflake Data Cloud.
Load Sample Data into Postgres and Snowflake
Set Up Postgres Database
Now that we have our database connections set up, let’s set up some pipelines to populate the Postgres table, PEOPLE, and the PEOPLE_UPDATES_SOURCE table. The PEOPLE_UPDATES_SOURCE table is required because we can’t read from and write to the same table in one pipeline. First, we need to create the tables in the Postgres instance by running the following DDL.
CREATE TABLE PUBLIC.PEOPLE (
ID VARCHAR PRIMARY KEY,
NAME VARCHAR,
SSN VARCHAR,
COUNTRY VARCHAR,
CRUD_OP INTEGER
);

CREATE TABLE PUBLIC.PEOPLE_UPDATES_SOURCE (
ID VARCHAR PRIMARY KEY,
NAME VARCHAR,
SSN VARCHAR,
COUNTRY VARCHAR,
CRUD_OP INTEGER
);
Now we can create a basic pipeline to populate the tables with random data.
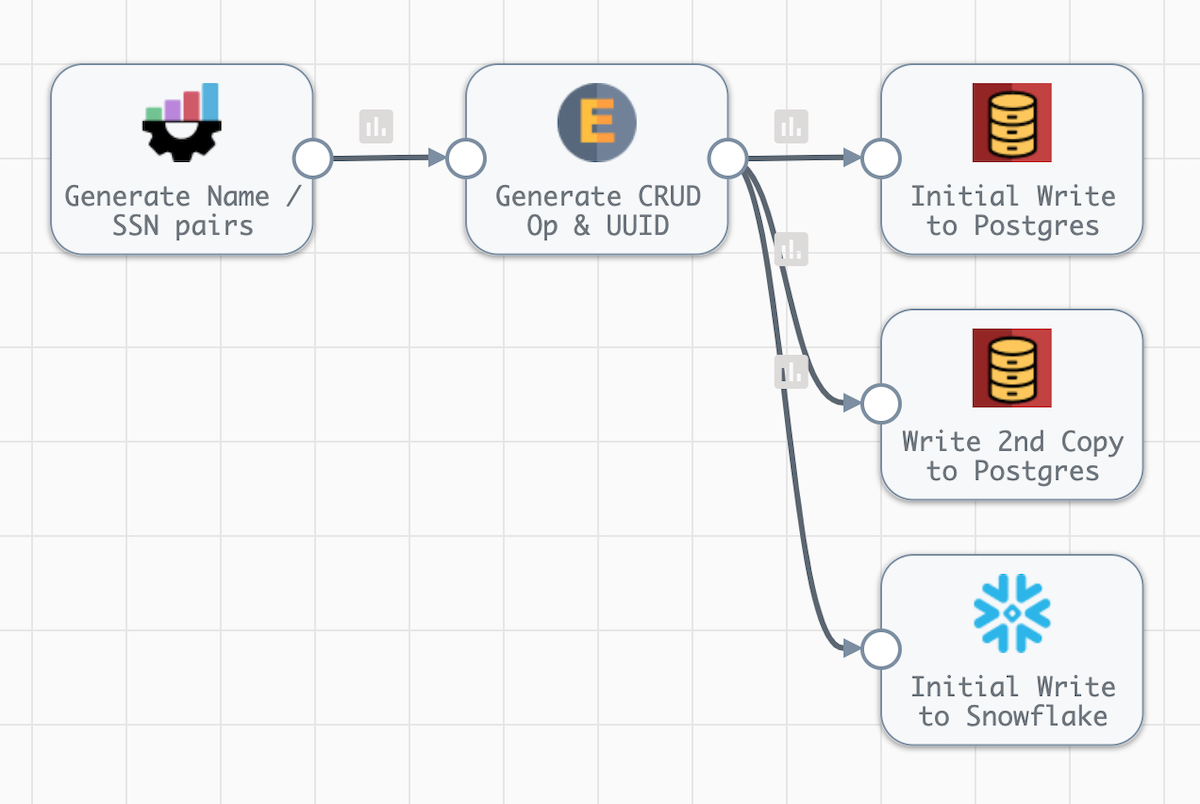
Pipeline Overview
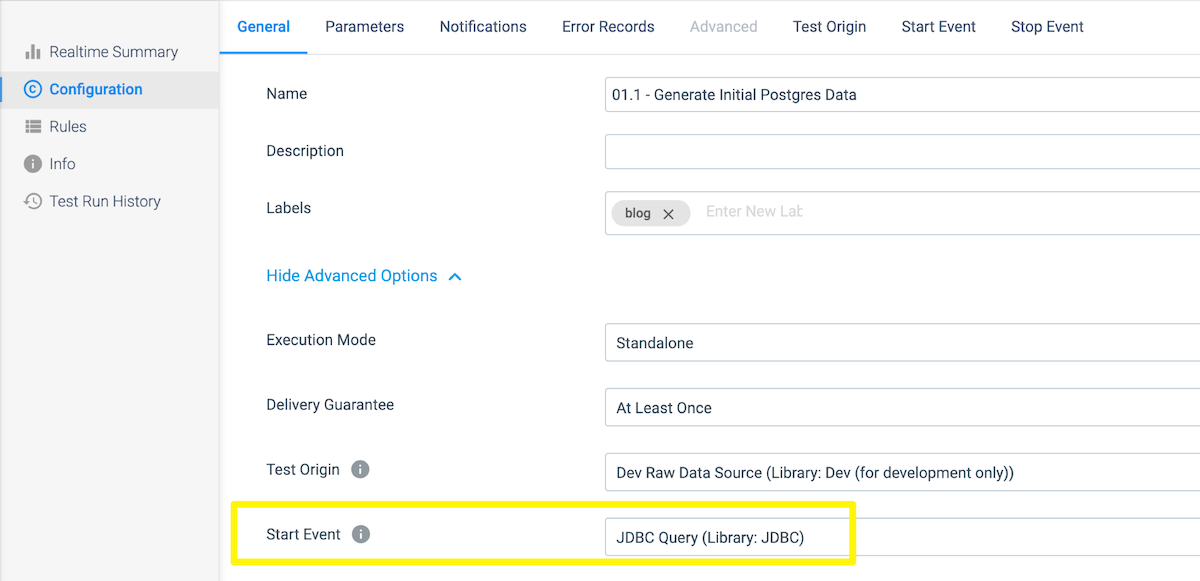
First, enable Show Advanced Options under the canvas.
- On the General tab, select JDBC Query (Library: JDBC) for the Start Event. For the purposes of this exercise, we will execute a few SQL statements before the pipeline executes to start every run with empty tables.
- On the Parameters tab, create the parameters as shown below for the Postgres schema and tables as well as the Snowflake warehouse, database, schema, table, and stage names.
 On the Start Event tab, we will add the SQL statements that will truncate the two postgres tables that we will be using before the pipeline runs. Note that the queries use the parameters set in the previous step. Select the Postgres connection created earlier, and enter these SQL Queries — truncate table ${PG_TABLE}; truncate table ${PG_TABLE_2};
Going back to the canvas, add a Dev Data Generator stage with the below configuration to create the random data.
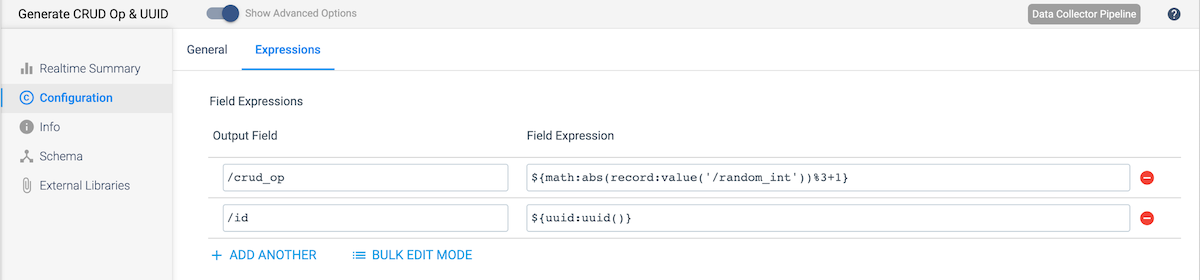
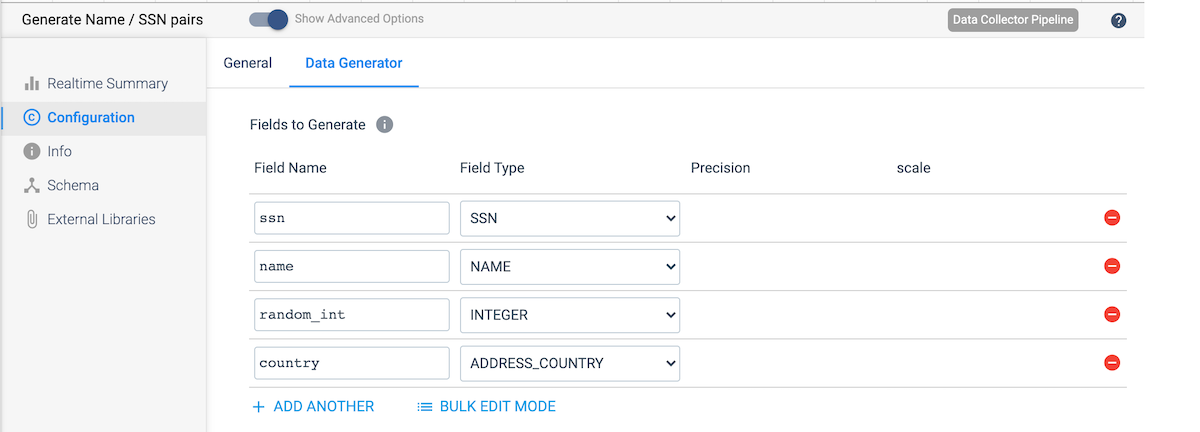 Next, add an Expression Evaluator stage. This will be used to create the following new fields:
- crud_op – We will use the random_int value created in the previous stage to randomly assign each record a value of 1, 2, or 3, corresponding to the CRUD operations – Create, Update, and Delete. To do this, we will calculate a new value using the modulo operator as shown here: ${math:abs(record:value(‘/random_int’))%3+1}
- id – CDC requires a unique primary key, so we will use the uuid() function to assign a unique id to each record as shown here: ${uuid:uuid()}
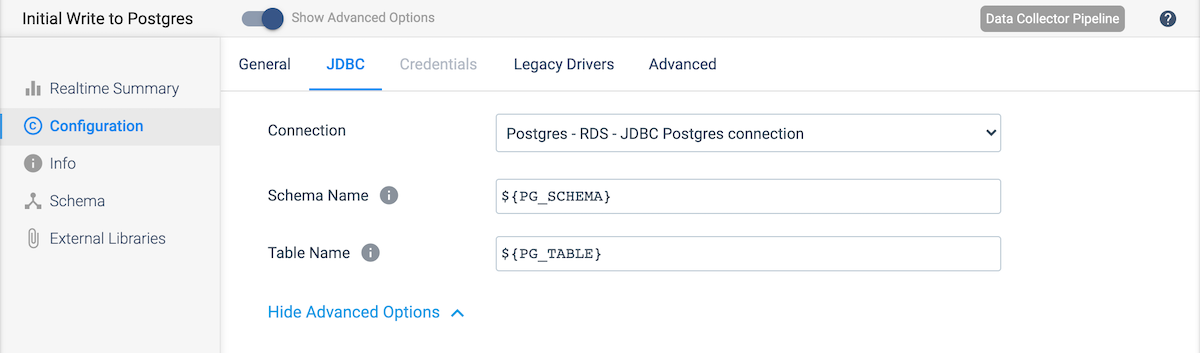
Connect the Expression Evaluator to a JDBC Producer destination to write the data to Postgres. Under the JDBC tab, select the Postgres connection created earlier. Then update the Schema Name and Table Name values to use the schema and table name parameters.
Copy the JDBC Producer destination created above by selecting the destination and selecting the copy icon in the menu that appears. Now connect the Expression Evaluator output to that table as well. In the settings, update the stage Name and the Table Name on the JDBC tab. Use ${PG_TABLE_2} as the Table Name.
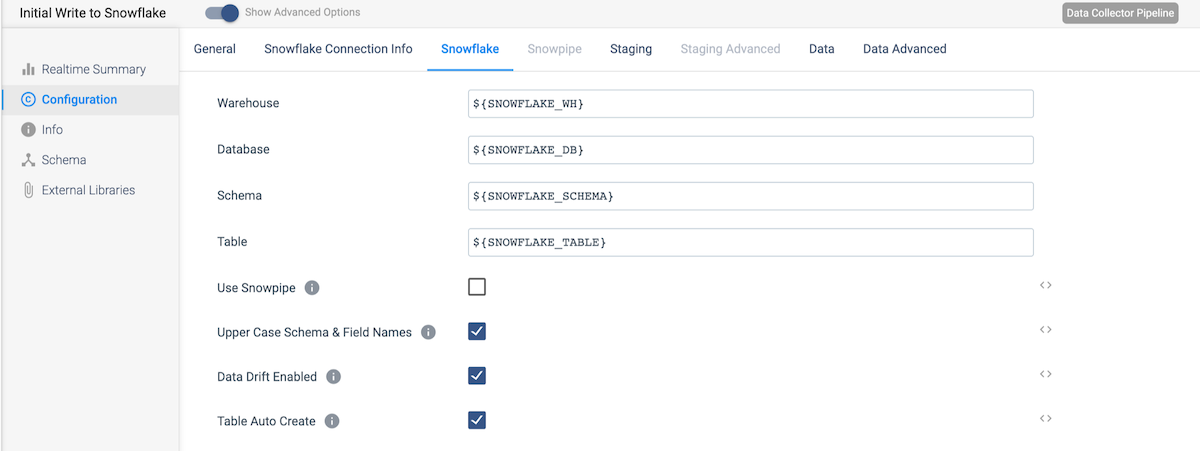
Next, add a Snowflake destination and connect the Expression Evaluator (the Expression Evaluator will now be connected to three destinations). On the Snowflake Connection Info tab, select the Snowflake connection. On the Snowflake tab, use the pipeline parameters as the values for Warehouse, Database, Schema, and Table. Also select the Data Drift Enabled option, and subsequently the Table Auto Create option that subsequently appears. Enabling the auto-creation of the table will automatically create the table if it does not already exist in Snowflake.
On the Staging tab, select the appropriate stage location, and use the parameter for the Snowflake Stage Name value.
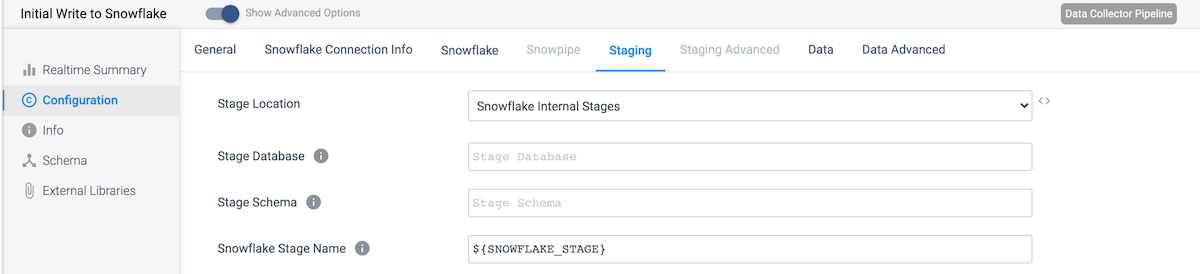
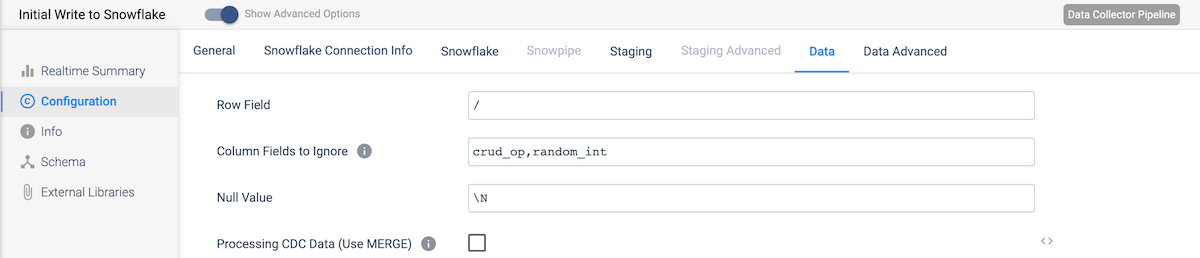
Finally, on the Data tab, add the columns crud_op and random_int to the Column Fields to Ignore since these are not part of the data we wish to replicate to Snowflake.
Now our first pipeline is complete! Run the pipeline to populate the Postgres and Snowflake tables with some data. Generating a few hundred rows should be sufficient. We do need to complete one more step. We need to add a primary key to the Snowflake table in order to do CDC. Run this DDL in Snowflake: ALTER TABLE [YOUR_SCHEMA_NAME].PEOPLE ADD PRIMARY KEY (ID);
Update and Delete Records in Postgres
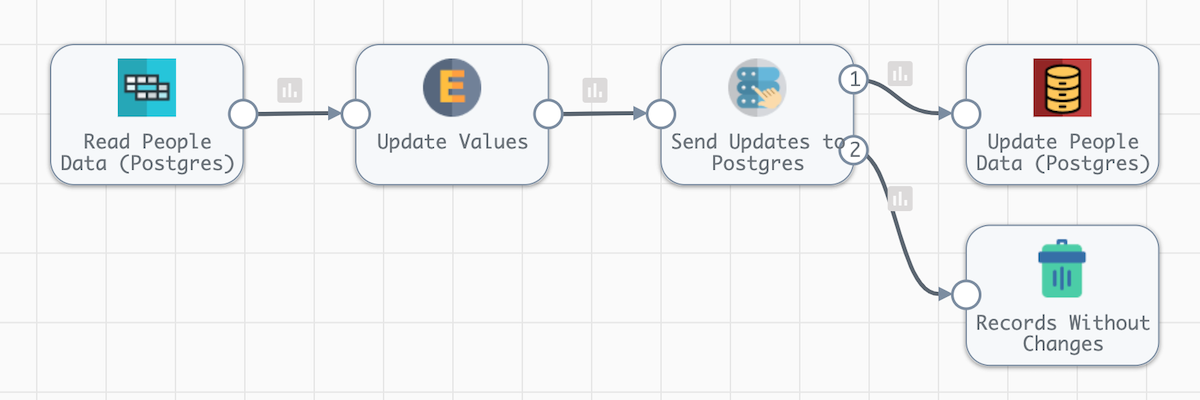
Now we will create a pipeline that will update and delete records in the Postgres PEOPLE table. It will use the PEOPLE_UPDATE_SOURCE table as the source of these updates so the pipeline is not updating the same table it is reading.
Pipeline Overview
- On the General tab, under the Advanced Options, update the Rate Limit (records / sec) value to 10. This is not a change you would apply to a production pipeline; we are setting this value very low to slow down the pace of the updates so it is easier to see what is happening.
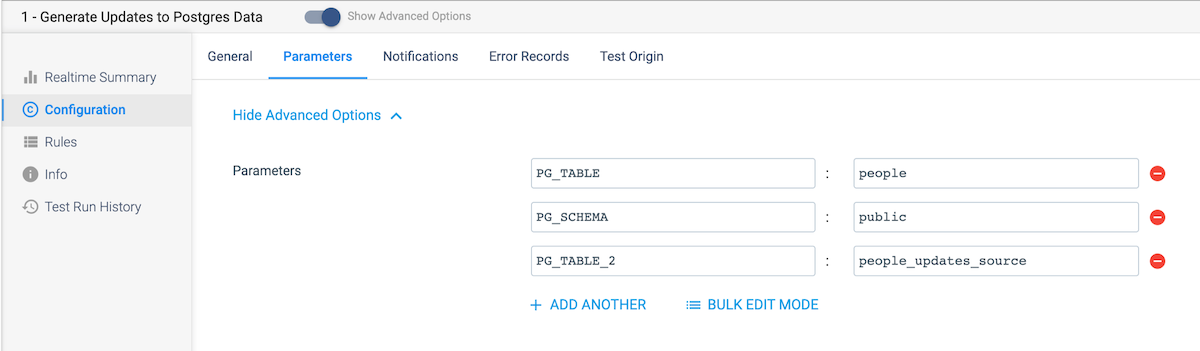
- Create the parameters as shown below for the Postgres schema and table names.
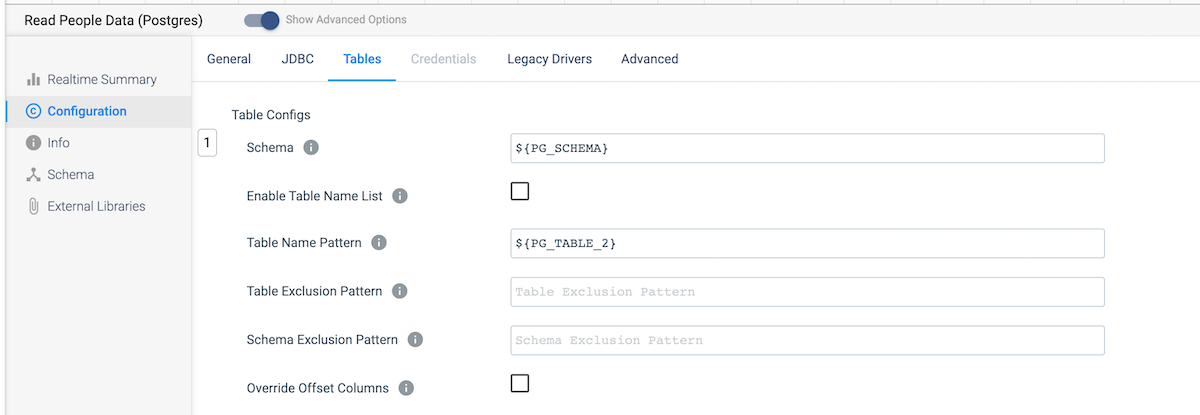
Add a JDBC Multitable Consumer origin to the canvas.
- On the JDBC tab, select your Postgres RDS JDBC connection and set the Max Batch Size (Records) to 10.
- On the Tables tab, update the Schema and Table Name Pattern configs to use your parameters for the schema and table name.
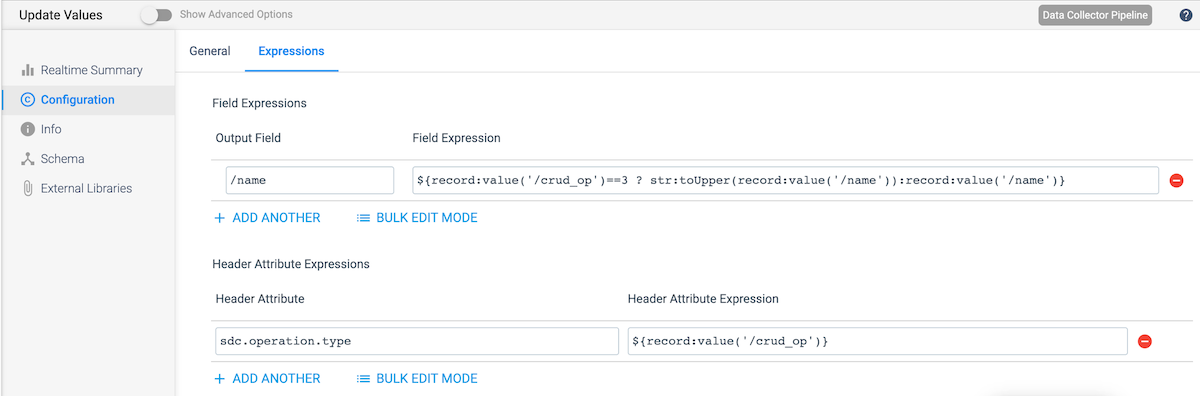
Add an Expression Evaluator that will update the name value for some records and populate the sdc.operation.type value to the appropriate code to indicate if the record is a Create, Update, or Delete. Use the following configs. :
- Field Expressions – Output Field: /name
- Field Expressions – Field Expression: enter an expression that will update only those rows with a crud_op of 3 (updates). In this example, the names are converted to all uppercase.
- Header Attribute Expressions – Header Attribute: sdc.operation.type
- Header Attribute Expressions – Header Attribute Expression: use the value of the crud_op field using the expression ${record:value(‘/crud_op’)}
Add a Stream Selector stage. This stage will pass on records that should be updated or deleted to the Postgres destination and will discard the rest.
- Add another condition
- Set the first condition to ${record:value(‘/crud_op’) != 1} and leave the second as default

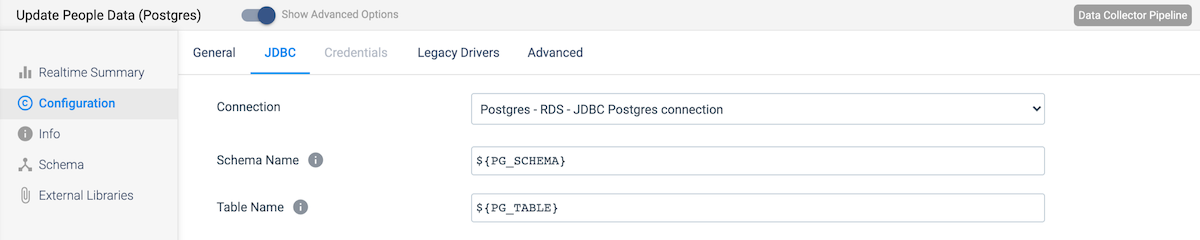
Connect Stream 1 to a JDBC Producer destination stage.
- On the JDBC tab, set the Connection to your Postgres RDS connection
- Use the parameters for ${PG_SCHEMA} and ${PG_TABLE} in the Schema Name and Table Name fields, respectively.
Connect Stream 2 to a Trash destination stage.
Decode Postgres CDC Metadata
One challenge when using Postgres as the source for CDC is that it generates Write-Ahead Logging (WAL) data as the records, which needs to be parsed for StreamSets and Snowflake to understand. Since this translation is the same for all Postgres data, we can create a Pipeline Fragment to reuse in any Postgres CDC pipelines. First we will create the pipeline, and then we will use the stages from that pipeline to make a reusable fragment.
Pipeline Overview

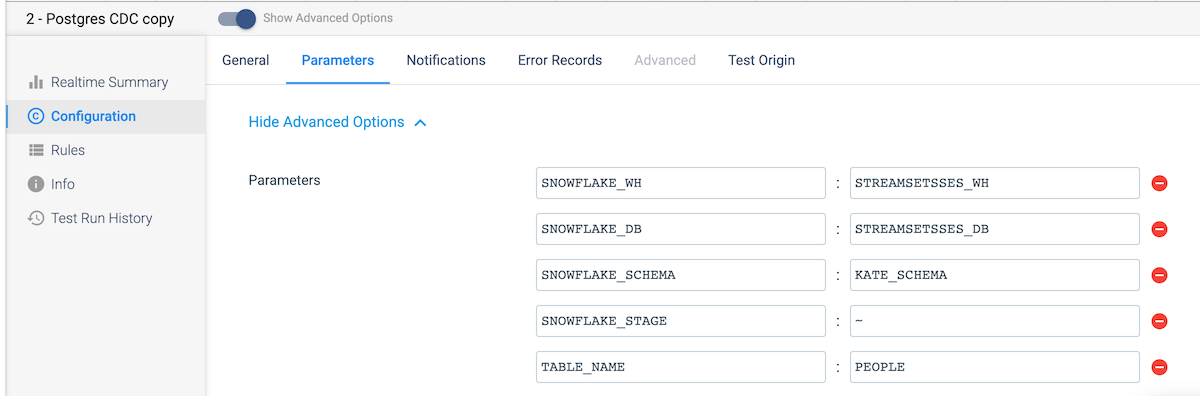
Create a new pipeline and add the parameters as shown below for the Snowflake warehouse, database, schema, table, and stage names, populating the default values with your Snowflake instance and schema information.
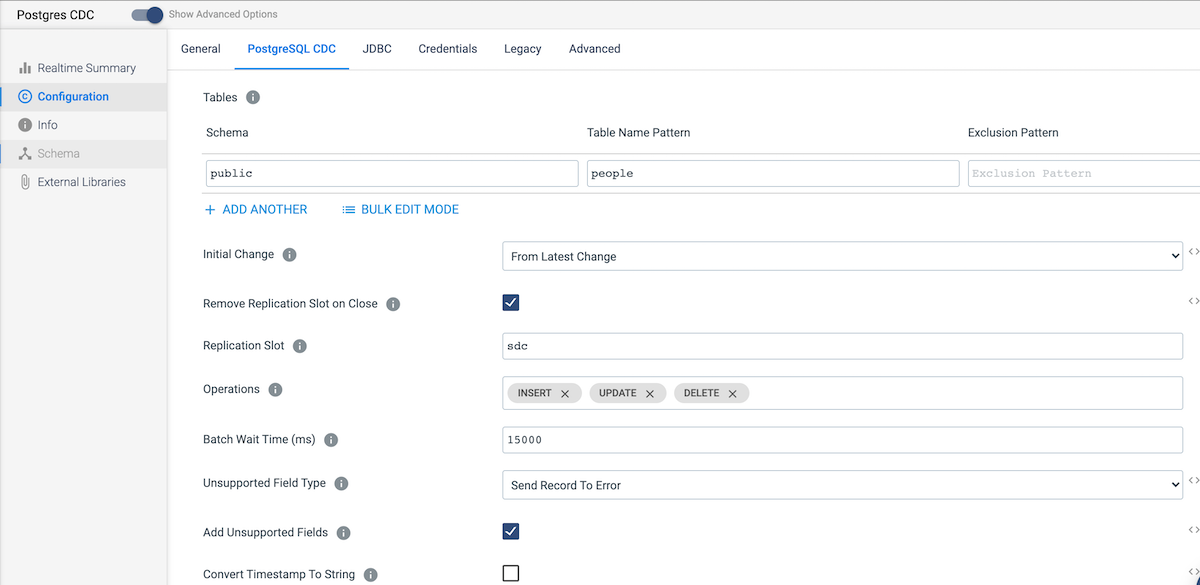
Add a Postgres CDC origin and configure it as follows:
- On the PostgresSQL CDC tab, under Tables, add the Schema and Table Name Pattern as shown below.
 On the JDBC tab, you can choose to use an existing Postgres connection (which you will have to create, since previously we created a generic JDBC connection to the RDS instance) or you can copy the connection information from the JDBC connection into this tab.
Now add a Jython Evaluator connected to the output of the Postgres CDC origin.
- On the Jython tab, paste this Jython code on GitHub into the Script field. This code will reformat WAL records for easier downstream processing.
Next, we will complete the optional step of adding an Expression Evaluator to the output of the Jython Evaluator. This step adds two fields, change_operation and change_time to include the database operation and insert/update time for each record. On the Expressions tab, add the following:
- Field Expressions (1) – Output Field: /change_operation
- Field Expressions (1) – Field Expression: ${record:attribute(‘kind’)}
- Field Expressions (2) – Output Field: /change_time
- Field Expressions (2) – Field Expression: ${time:now()}
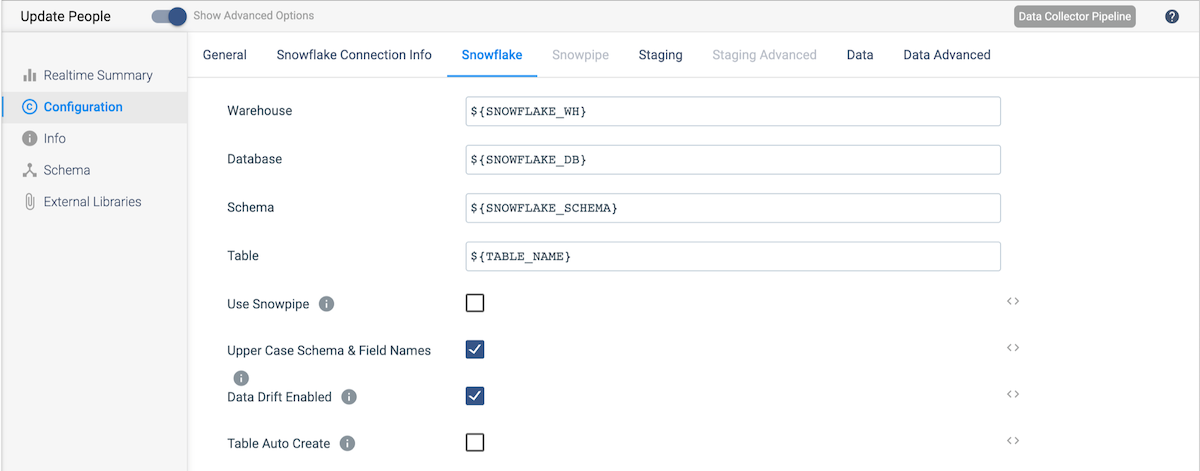
Now connect the Expression Evaluator output to a Snowflake destination and configure it as follows:
- On the Snowflake Connection Info tab, select the Snowflake connection created earlier.
- On the Snowflake tab, use the parameters created for this pipeline for the Warehouse, Database, Schema, and Table values, and make sure that the Upper Case Schema & Field Name and Data Drift Enabled options are selected.
 On the Staging tab, add ${SNOWFLAKE_STAGE} as the value for Snowflake Stage Name.
- On the Data tab, make sure that the Processing CDC Data (Use MERGE) and Get Primary Key Information From Snowflake options are both selected.
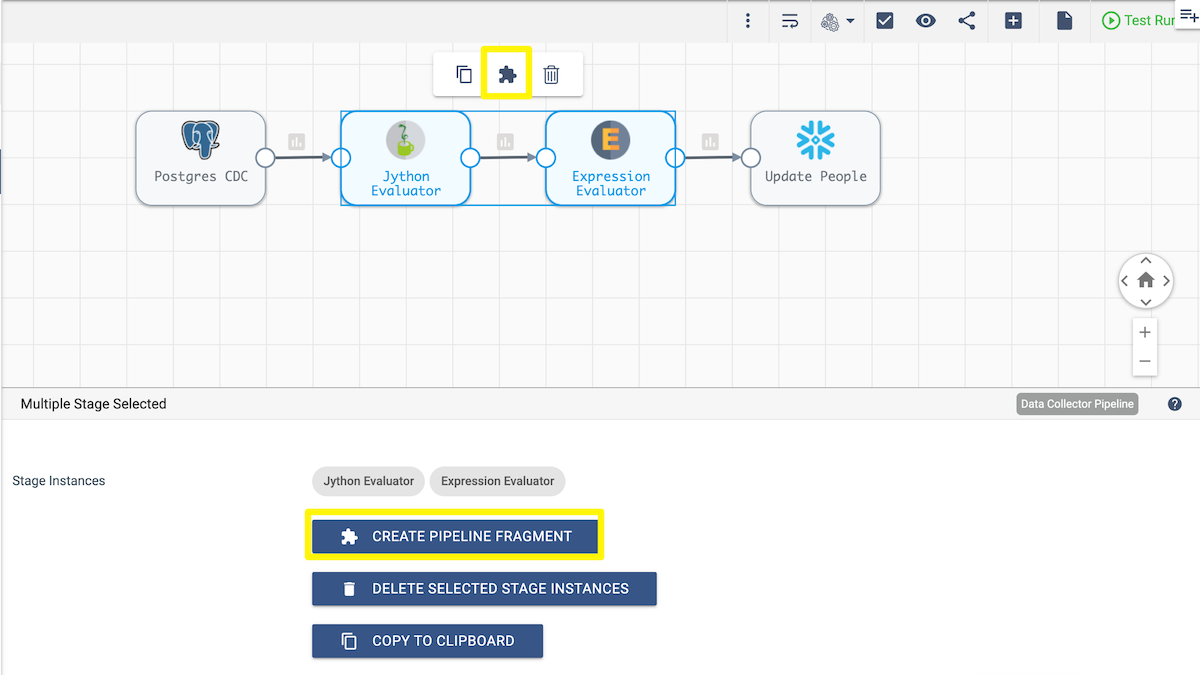
Reusable Fragment
Saving the logic to translate the Postgres WAL data into a reusable fragment only takes a few clicks. First, select the stages that you want to save. You can hold down the Shift key while selecting the two stages to save. Once these are selected, saving them as a fragment is as simple as selecting the puzzle-piece icon from the menu that appears above the stages or selecting the Create Pipeline Fragment button that appears below the canvas. Give the fragment a name, description, and select the Data Collector engine type. Now the fragment is available to be added to any Data Collector pipelines.
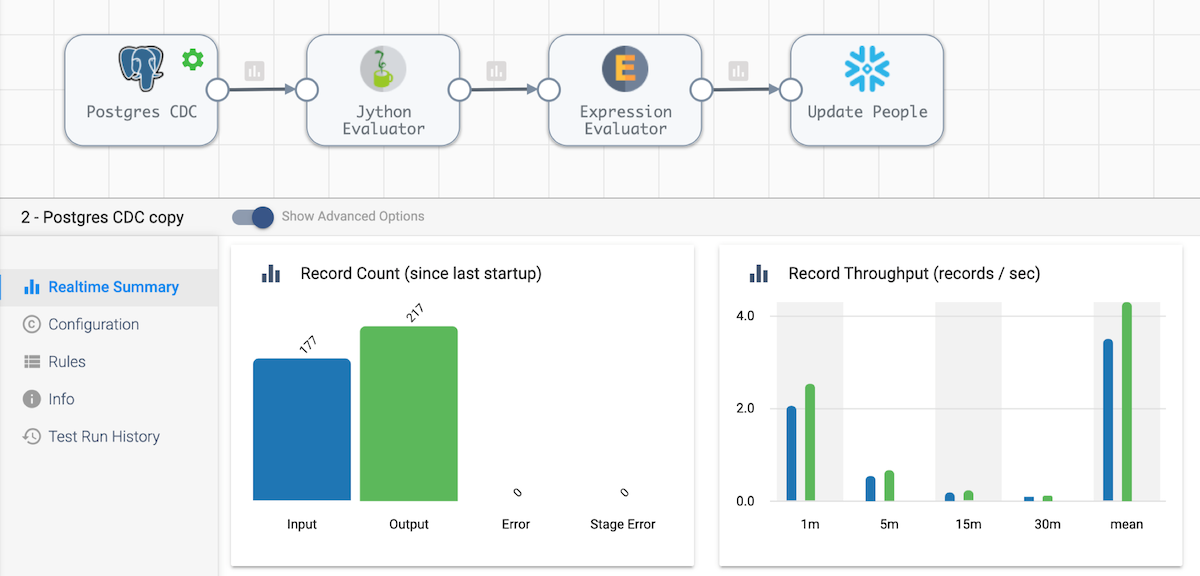
Pipeline Execution
Now start the pipeline we created the previous section to update and delete the records in Postgres. Start the CDC pipeline. Once these are both running, you should start to see the changes roll into Snowflake Data Cloud.
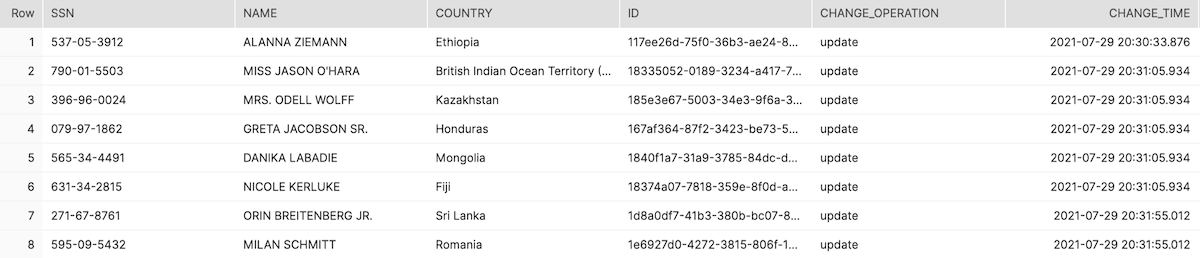
You can check out the changes in Snowflake. Keep in mind that some records were deleted and others were updated.
SELECT * FROM people where change_time is not null LIMIT 10;