 Last December, I covered Continuous Data Integration with StreamSets Data Collector and Spark Streaming on Databricks. In StreamSets Data Collector (SDC) version 2.5.0.0 we added the Spark Executor, allowing your pipelines to trigger a Spark application, running on Apache YARN or Databricks. I’m going to cover the latter in this blog post, showing you how to trigger a notebook job on Databricks from events in a pipeline, generating analyses and visualizations on demand.
Here’s a short video of the integration in action:
Writing Data to Amazon S3
I’m going to start with the ‘taxi tutorial’ pipeline from the SDC documentation. If you haven’t already downloaded SDC and completed the taxi tutorial, I strongly encourage you to do so. You’ll need that pipeline to follow this example, anyway.
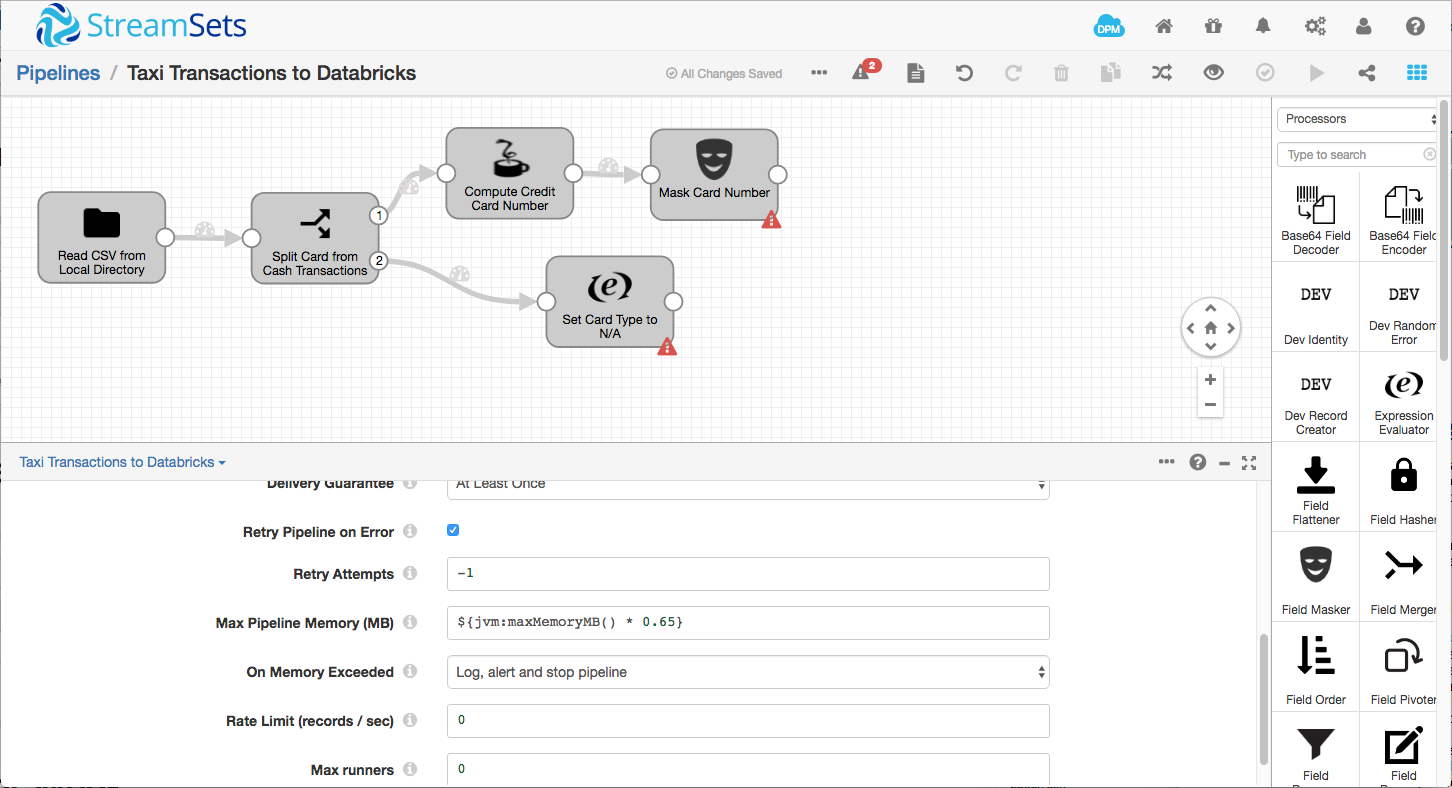
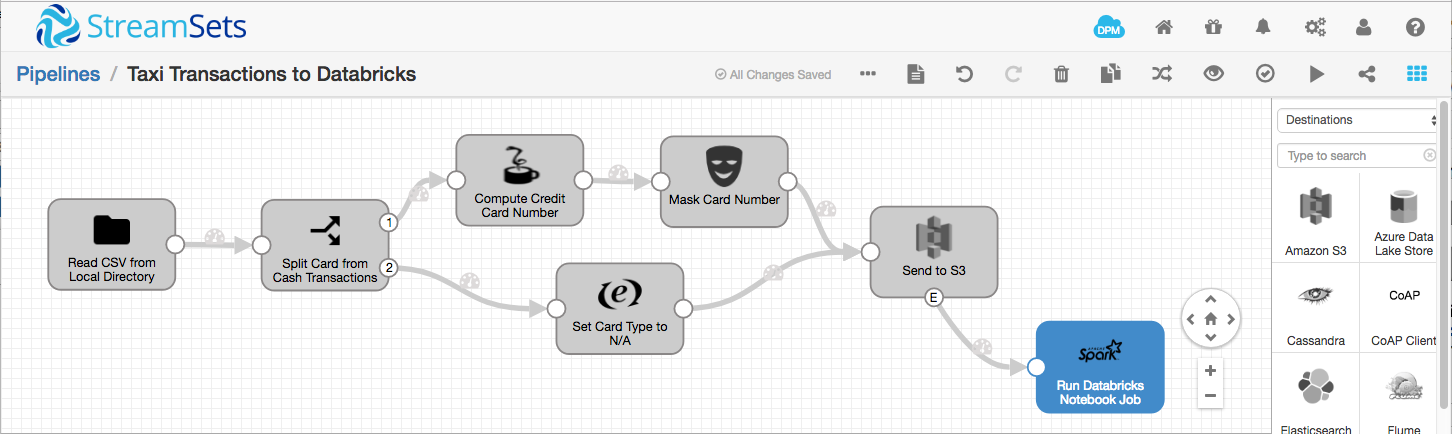
Start by duplicating the taxi tutorial to a new pipeline, and remove the Hadoop FS destination:
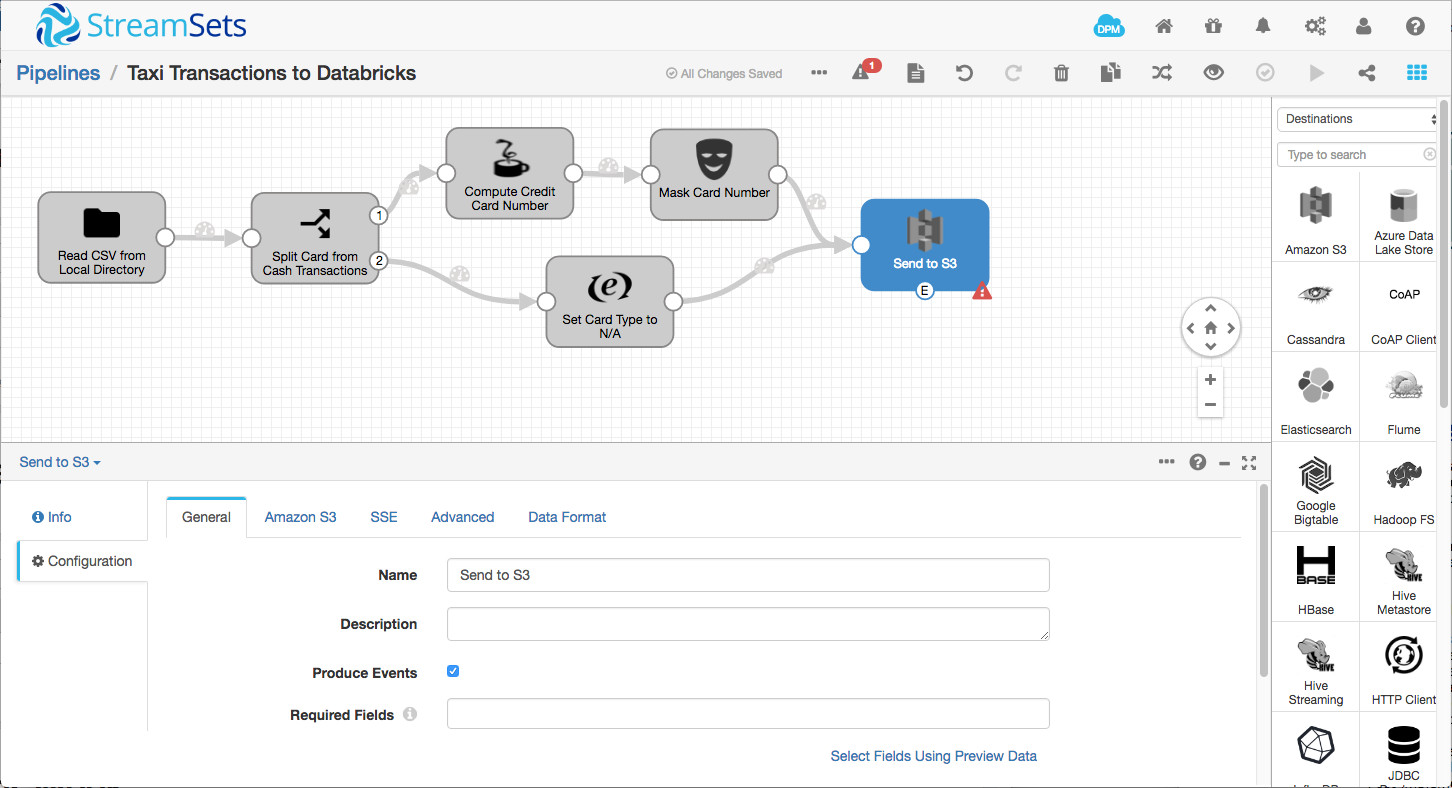
We’ll be writing data to S3, since Databricks can mount an S3 bucket for consumption by Spark apps. Add an Amazon S3 destination to the pipeline, connecting the outputs from the Field Masker and Expression Evaluator processors to its input:
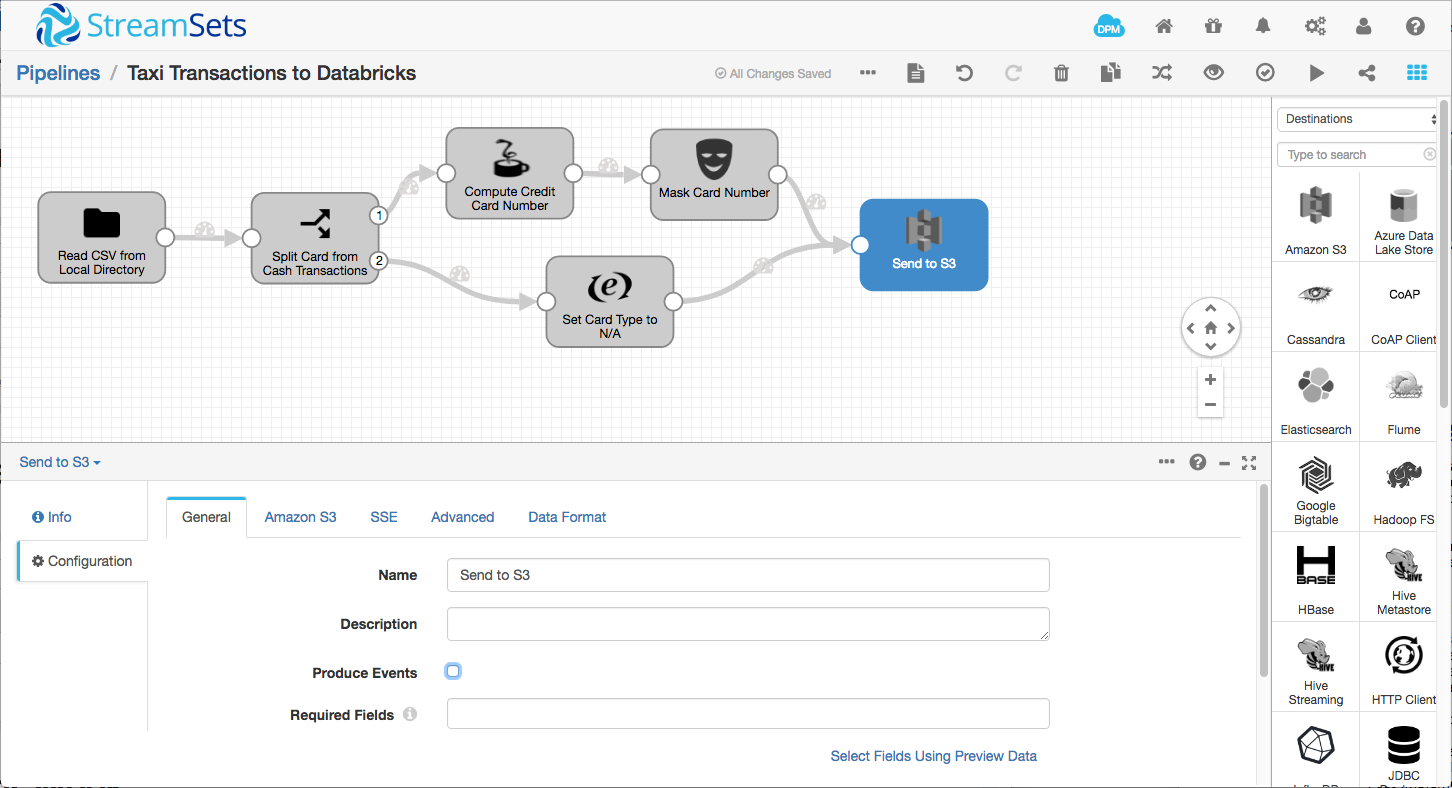
You’ll need to configure the S3 destination with your Amazon credentials (preferably via runtime resources, so your key and secret aren’t in the actual pipeline definition), region, bucket and, optionally, a Common Prefix – essentially the path into which SDC will write S3 objects. On the Data Format tab, select Delimited data format, With Header Line, and leave the remainder of the settings with their default values.
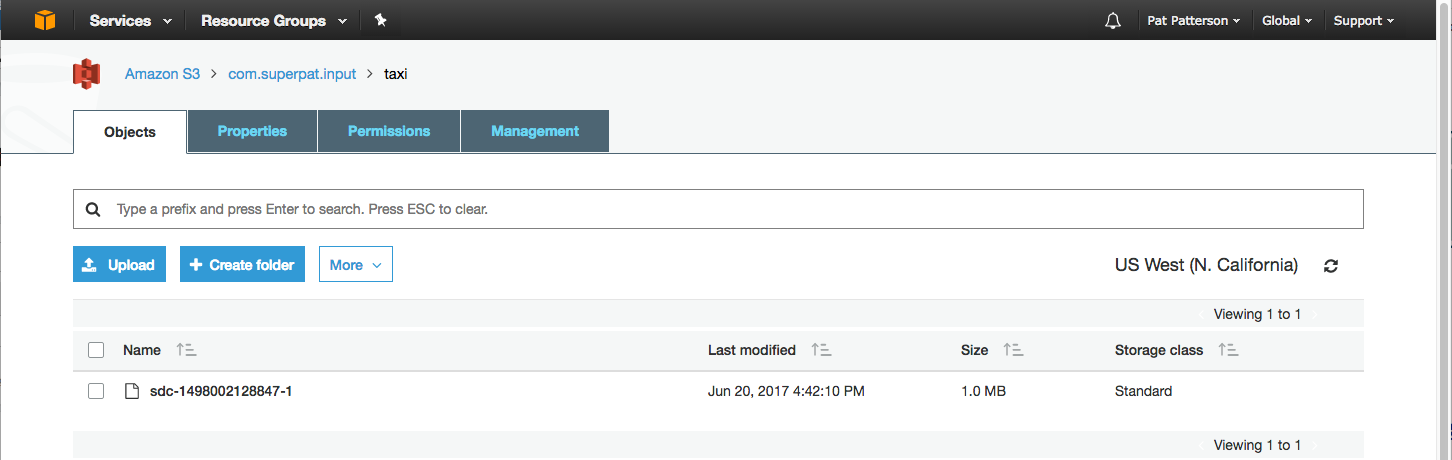
Let’s test things out before we go any further. Run the pipeline, and you should see 5000 or so records being processed. If you don’t see any activity in the pipeline, stop it, reset the origin, and restart it. Check the S3 bucket and you should see the S3 objects that SDC has created:
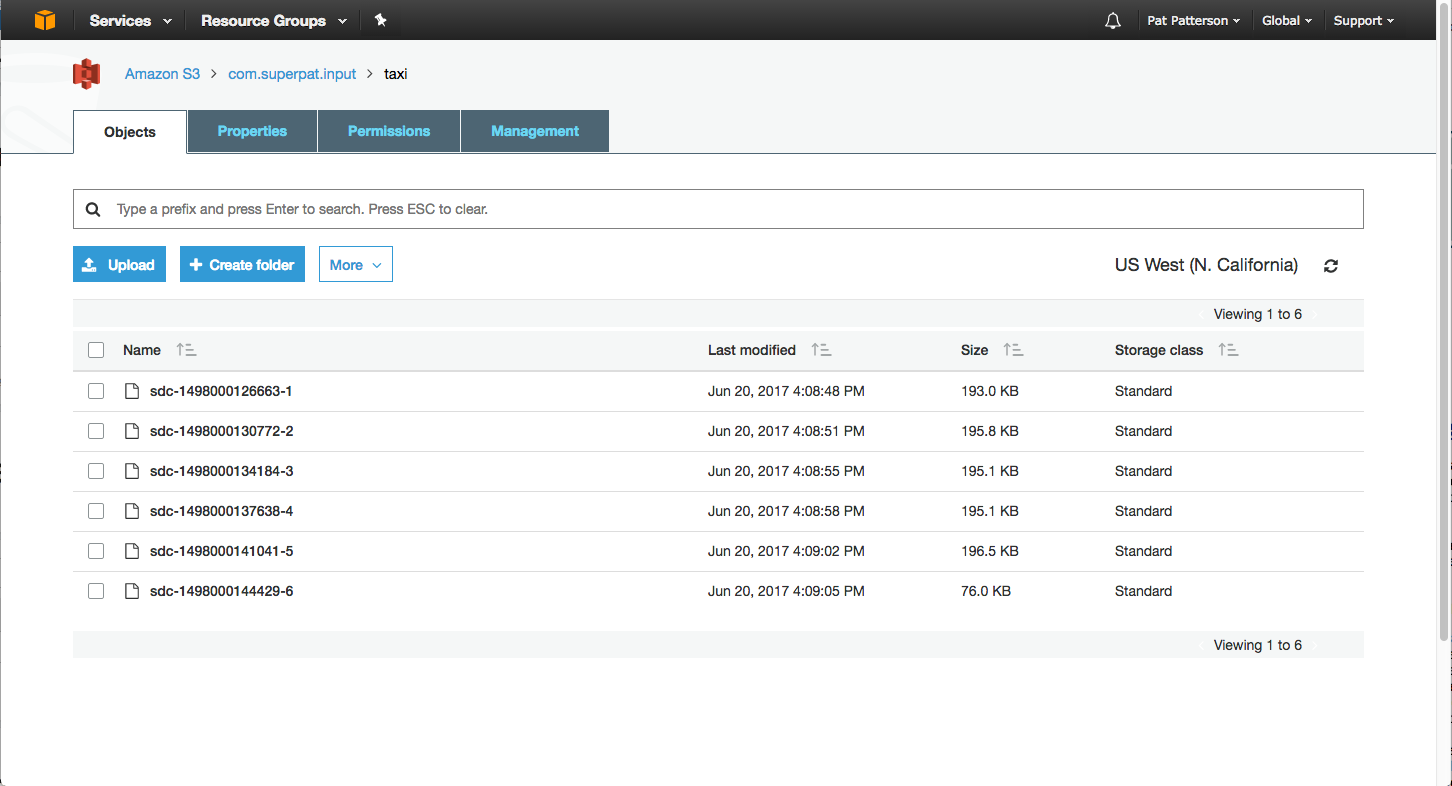
Because the default batch size is 1000 records, SDC creates a total of six S3 objects, one per batch. For this use case, we want the data to arrive in a single S3 object, so we’ll change SDC’s configuration to allow this. There is a hard batch size limit set in the sdc.properties file, located in SDC’s configuration directory. Edit the file, and change this line:
production.maxBatchSize=1000to this:
production.maxBatchSize=10000Restart SDC, and, on the Directory origin’s Files tab, change the Batch Size to 10000 records. Empty your S3 bucket, reset the origin, and rerun the pipeine. You should see the same number of records sent to S3, but only one S3 object:
Creating a Databricks Notebook
Now it’s time to turn our attention to Databricks. Login to Databricks, and import the TaxiData notebook by clicking Import from any folder’s menu, and pasting in the following URL:
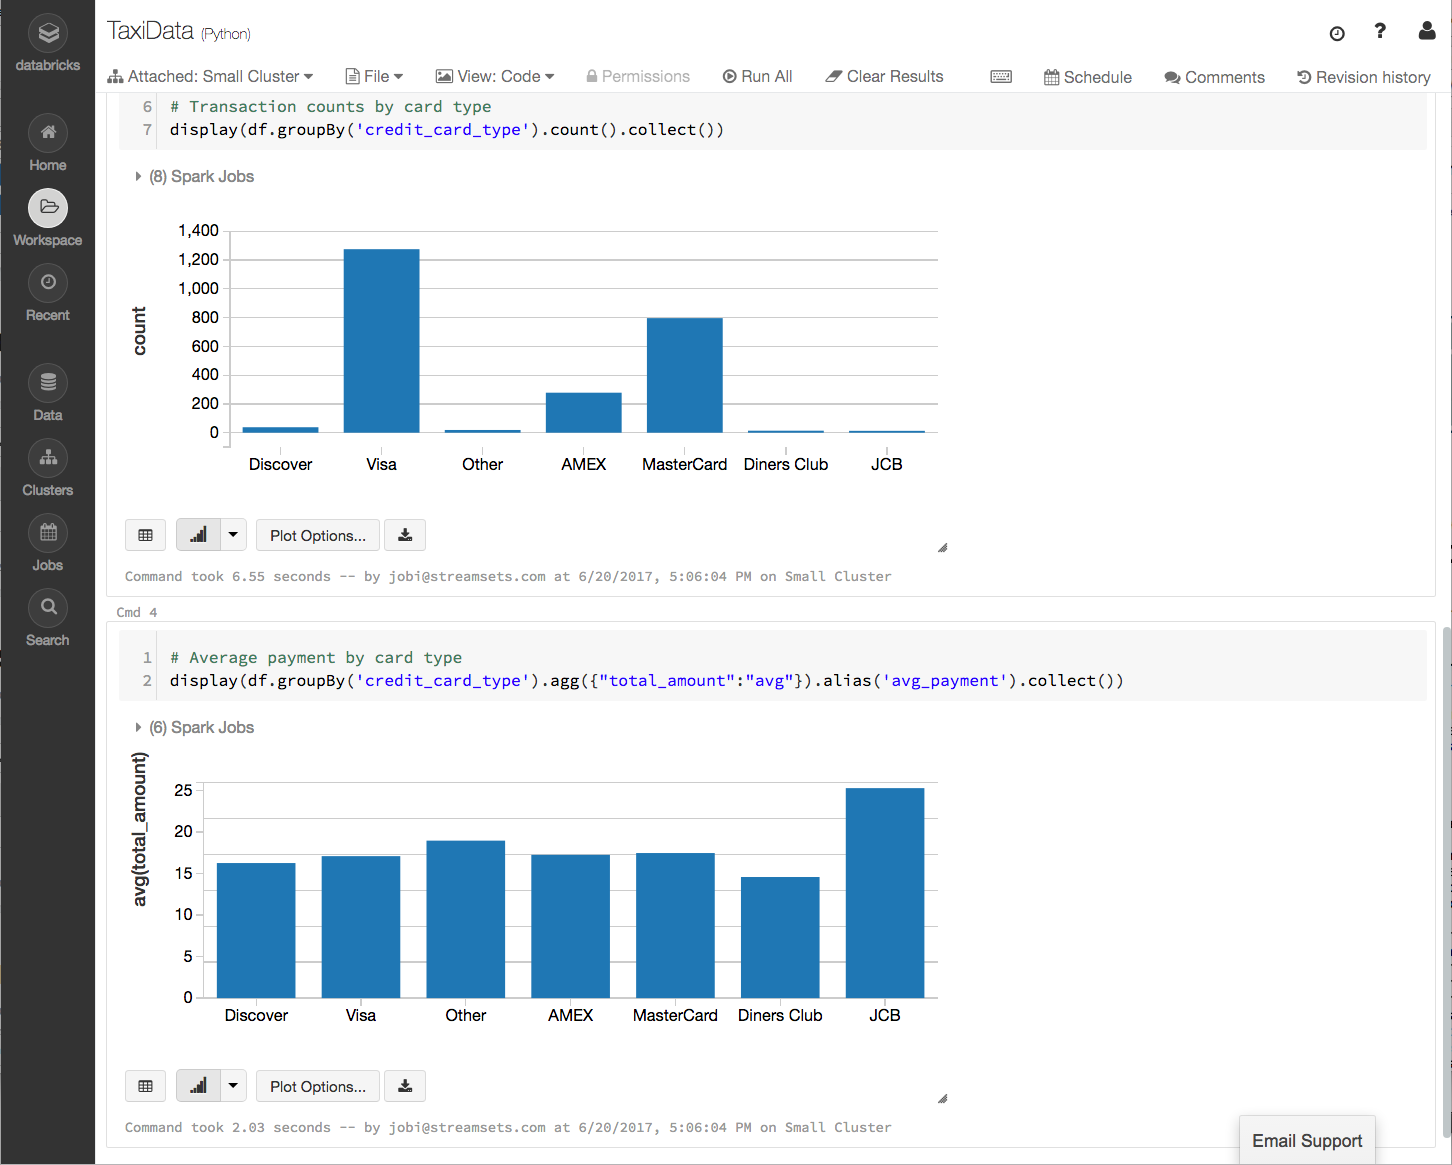
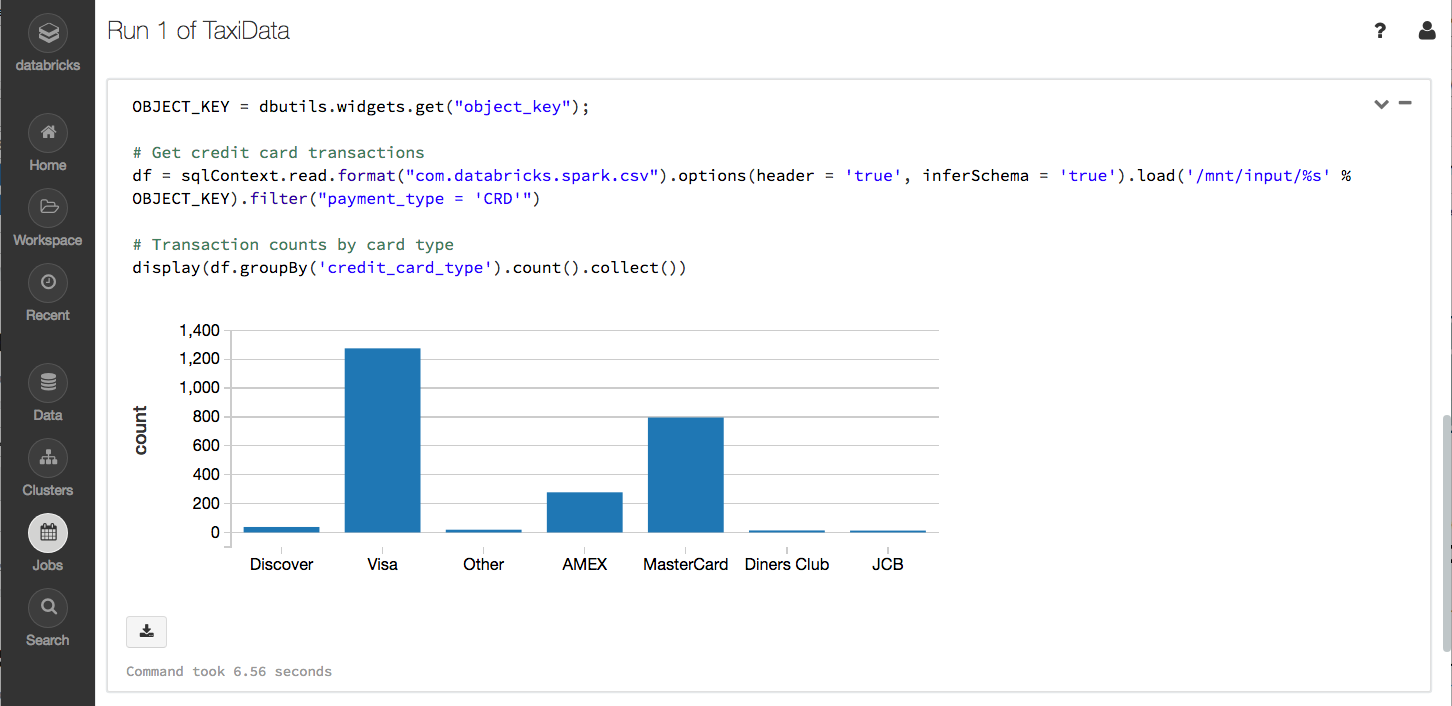
https://gist.githubusercontent.com/metadaddy/707f8eadfb3758cb7ed0519edd29948f/raw/478fb640528519533465b321dd3d97e45ea9bd63/TaxiData.htmlSince the notebook exposes the AWS credentials and object location as widgets, we can easily test the notebook on the data that SDC just wrote to S3. Enter the relevant data into the widgets at the top of the notebook. Note that the S3 object key will need the prefix (if you used one) and the S3 object key from the bucket listing in the AWS console, for example, taxi/sdc-1498002128847-1. Click Run All and you should see the S3 bucket being mounted and two charts (you will need to start your Databricks cluster if it is not already running). The first chart shows the number of transactions per credit card type, the second shows the average total payment by credit card type:
This is great, but it’s still very manual. How do we run that notebook after each object is written to S3?
Triggering a Databricks Notebook Job
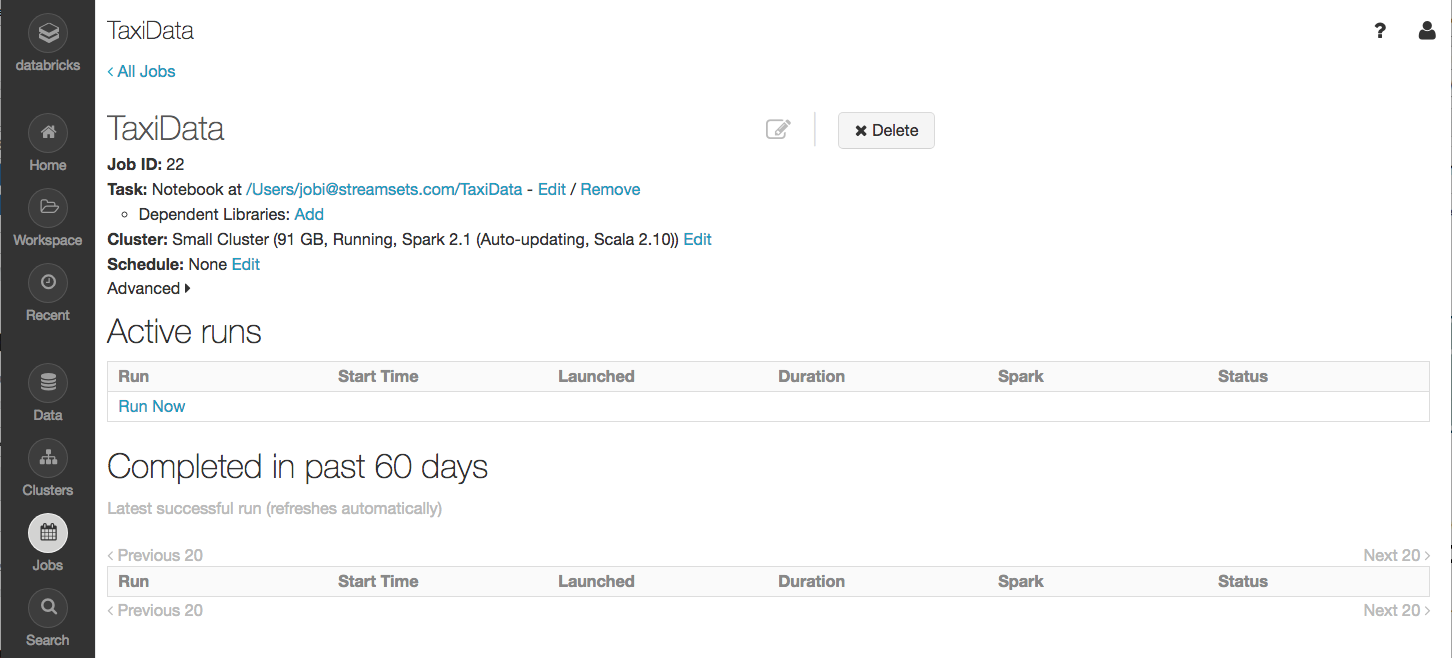
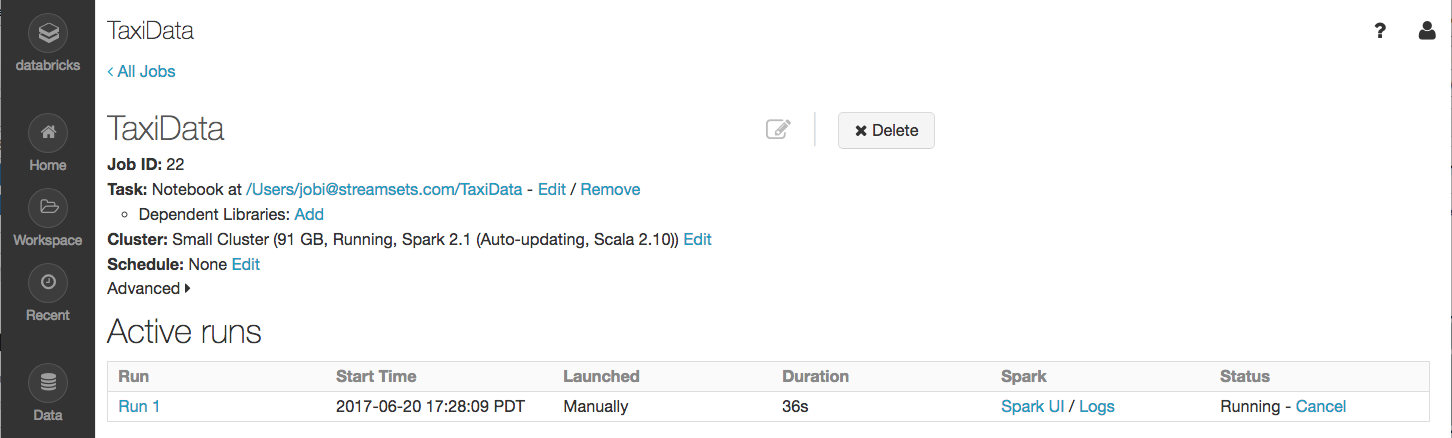
We’ll need to create a Databricks Job for the notebook. In Databricks, go to Jobs, then click Create Job. Give the job a name, and click Select Notebook. Select the TaxiData notebook, configure the job’s cluster, and make a note of the Job ID:
Now enable Produce Events on the S3 destination’s General tab. You’ll notice an event output appear at the bottom edge of the S3 destination:
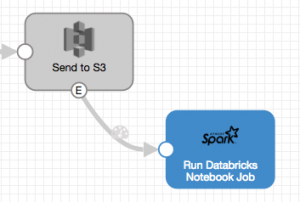
Add a Spark Executor to the pipeline, connected to the S3 destination’s event output:
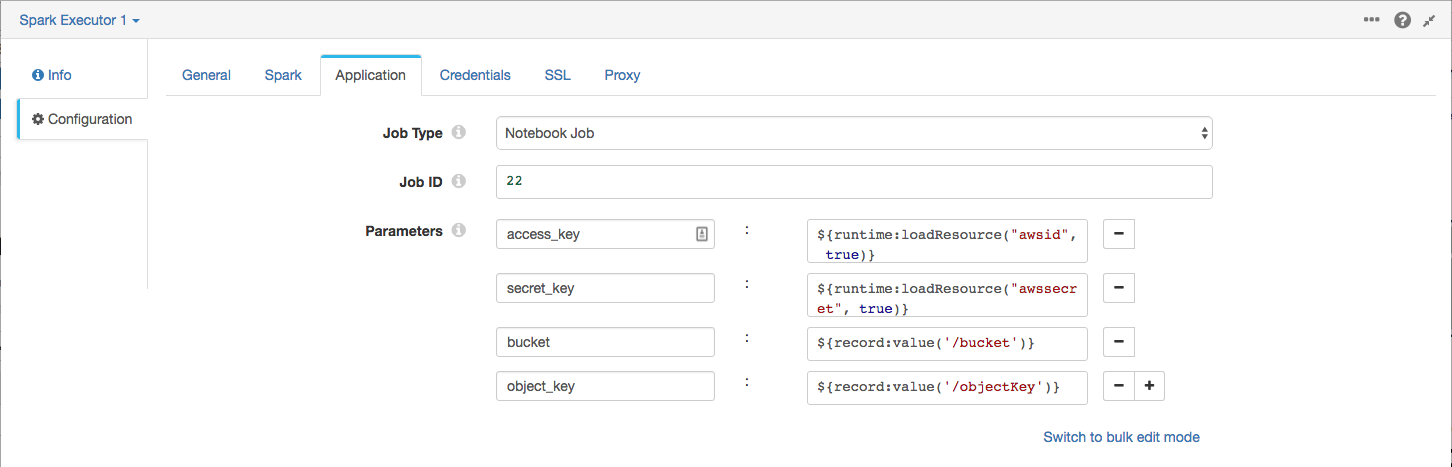
On the Spark tab, set the Cluster Base URL appropriately – for example, https://mycompany-dev-partner.cloud.databricks.com. On the Application tab, set the Job Type to Notebook Job, set the Job ID to the value from the previous step, and set the following four parameters:
access_key |
Your AWS access key |
secret_key |
Your AWS secret key |
bucket |
${record:value('/bucket')} |
object_key |
${record:value('/objectKey')} |
Again, I highly recommend you use runtime resources to hold your AWS credentials, as I did:
Enter your Databricks username and password in the Credentials tab (blah, blah, runtime resources, you get the picture!), reset the origin, and run the pipeline!
After you see that the records have been processed in SDC, go to the Databricks Jobs page, click on the notebook job you created, and you should see that it’s running:
Click on the Run 1 link, and you should see the same charts as you saw when you ran the notebook manually. Success!
Conclusion
Now you can modify the pipeline and notebook, drop in your own data, and explore the opportunities offered by the combination of StreamSets Data Collector and Databricks. Let us know in the comments how you get on!