 Hello from your newly-appointed community champion and technical evangelist here at StreamSets! My name is Dash Desai and you will find me writing blog posts and cruising the community forums answering questions about StreamSets Data Collector as well as learning from community members. I will also be presenting at meetups and conferences so if you happen to be attending, please stop by and say hi. My first blog for StreamSets, explaining the powerful Preview and Snapshot features in Data Collector, was inspired by one of the community members. (Thank you, Edward.)
Introduction
When creating data pipelines for big data projects and working with a diverse set of structured, semi-structured and unstructured data sources, it is imperative that you get a true sense of the data transformations at every stage. Not just to ensure data integrity and data quality but also for debugging and audit trail purposes. So phrases like “Garbage in, Garbage out”, “Fail fast, Fail often” and “Agile and Iterative development” are also applicable to creating dataflow pipelines.
In this blog post, you will learn about two features – Preview and Snapshot – available in StreamSets Data Collector, that help you examine input and output at every stage in your pipelines–both in development mode as well as at runtime.
Let’s consider the following use case.
Given a dynamic list of hashtags, we’d like to search Twitter and capture specific information about matching tweets such as, user, screenname, text, geo, coordinates, and created_at for further analysis. For example, to find influencers about a certain topic. Let’s get started!
First, we’ll create a text file (named hashtags.txt) with the following hashtags:
%23DataOps
%23BigData
%23MachineLearning
%23DataScience
(Note: For guidelines on Twitter Search API and operators, refer to their documentation.)
Next we’ll set up the pipeline in two parts.
Part 1 – Build and Preview
In this section, we will build a simple pipeline with origin, one processor, and a destination. This will enable us to preview the Twitter HTTP response and its JSON structure — which will in turn help us understand what additional stage(s) we will need to ultimately get our desired output. (Note: We will build upon this pipeline to add additional stages in Part 2 outlined below.)
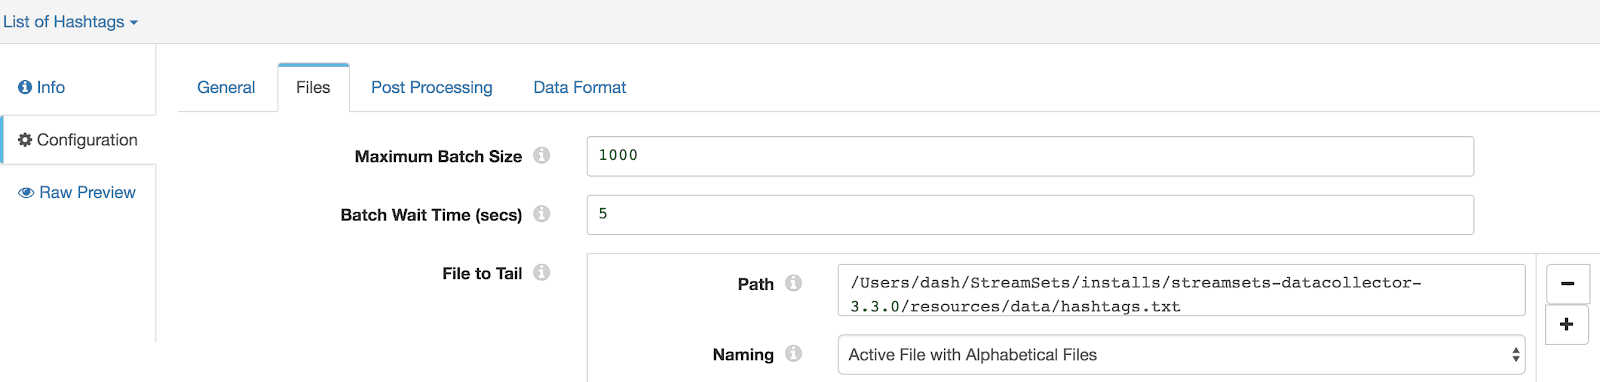
Step 1: Add File Tail Origin
This will be configured to read keywords, hashtags, etc. from hashtags.txt file.
- – Under ‘Files’ tab enter ‘File To Tail’ information including ‘Path’ and ‘Naming’
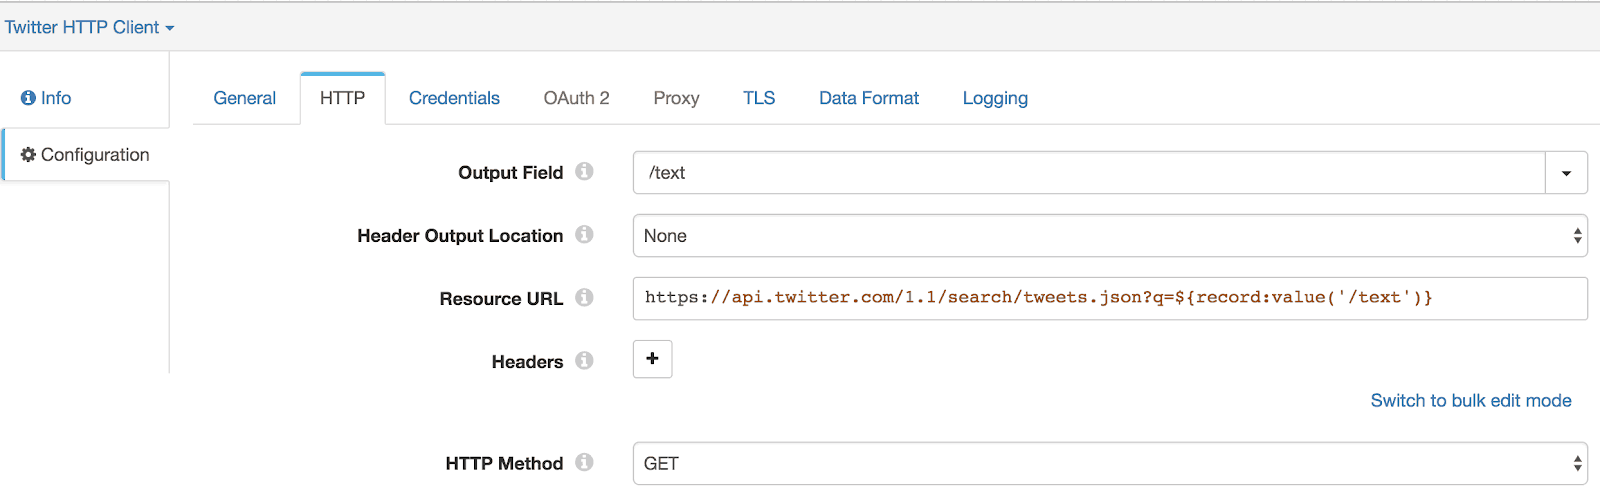
Step 2: Add HTTP Client Processor
To send requests to Twitter’s HTTP search resource URL. Create a link between File Tail origin’s “Data” (marked as “1”) stream and HTTP Client processor.
- – Under ‘HTTP’ tab:
- — Enter ‘/text’ for ‘Output Field’
- — Enter ‘https://api.twitter.com/1.1/search/tweets.json?q=${record:value(‘/text’)}‘ for ‘Resource URL’ (Note: this will dynamically insert hashtags, keywords, etc. as they are read from the text file)
- — Select ‘Get’ for ‘HTTP Method’
- — Select ‘OAuth’ for ‘Authentication Type’
- – Under ‘Credentials’ tab enter your Twitter application credentials
- – Under ‘Data Format’ tab select ‘JSON’ for ‘Data Format’ and 32768000 for ‘Max Object Length (chars)’
At this point we have the origin and a processor setup to receive data from Twitter. Before we add more transformations, let’s add destination (Local File System for simplicity) so we can review the HTTP response and its JSON structure.
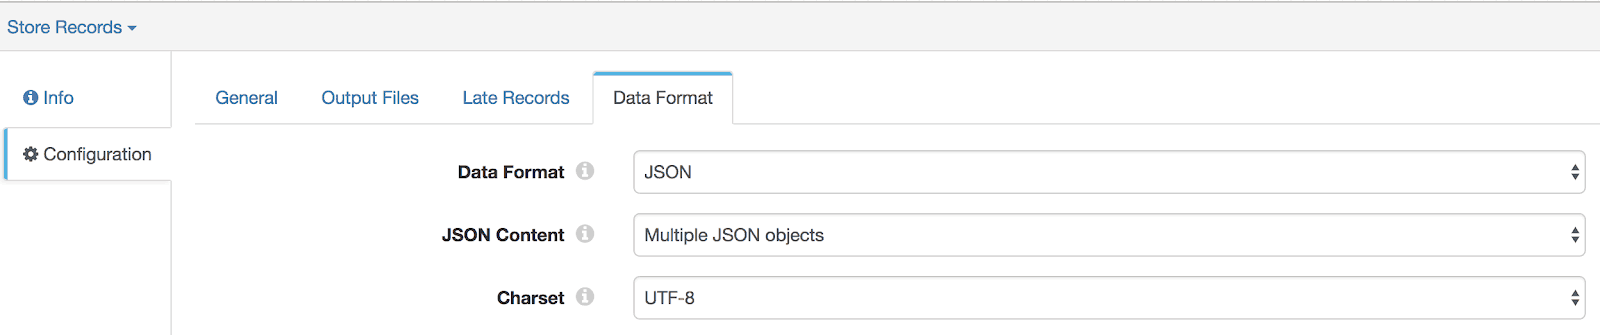
Step 3: Add Local File System Destination
This will store our final output in the (default) location specified under Output Files tab.
- – Under ‘Data Format’ tab select JSON for Data Format
Note: These records can be easily stored in other destinations such as, Amazon S3, Azure Data Lake Store, Kafka Producer, RDBMS or any of a variety of NoSQL data stores for further analysis.
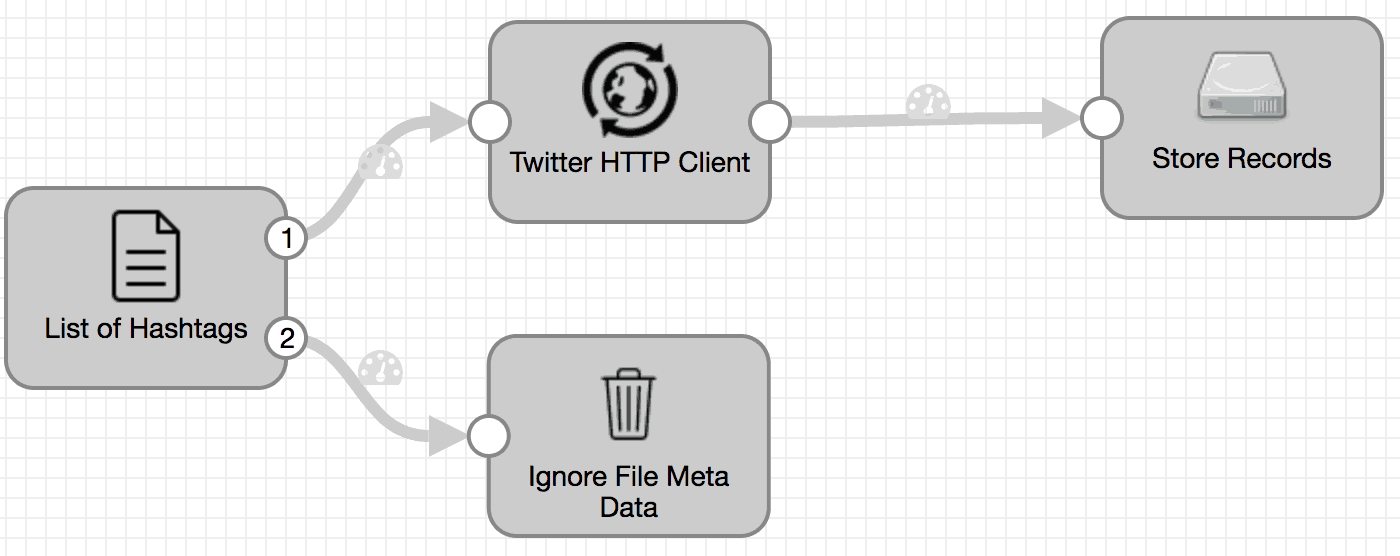
Step 4: Add Trash Destination
Create a link between File Tail origin’s “Metadata” (marked as “2”) stream and this Trash destination. For simplicity, we will ignore the file metadata.
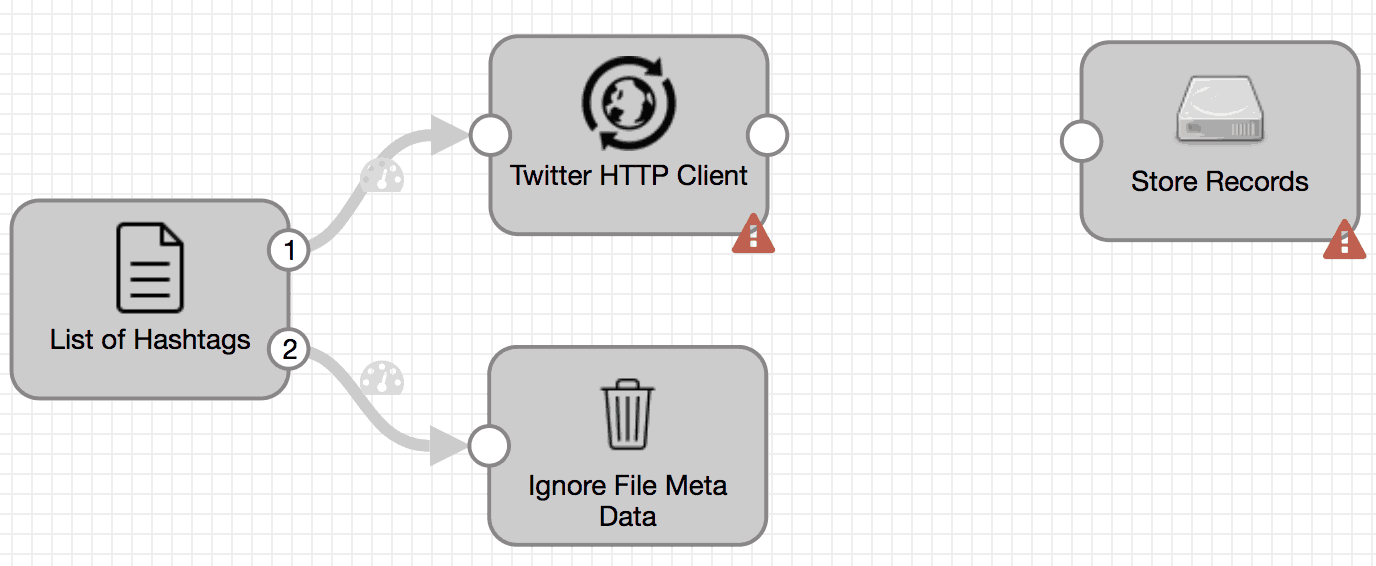
Here’s what our pipeline looks like so far.
Click on Validate and make sure everything looks good.

Now click on Preview. (Leave default settings on Preview Configuration popup.)

Give it a few seconds and you should see some data flow through in the bottom pane. Click on HTTP Client Processor — in the bottom pane on the left, there will be one record per hashtag and on the right its corresponding response. Expand the first records on both sides. Notice that the tweets are nested in the response under statuses list.
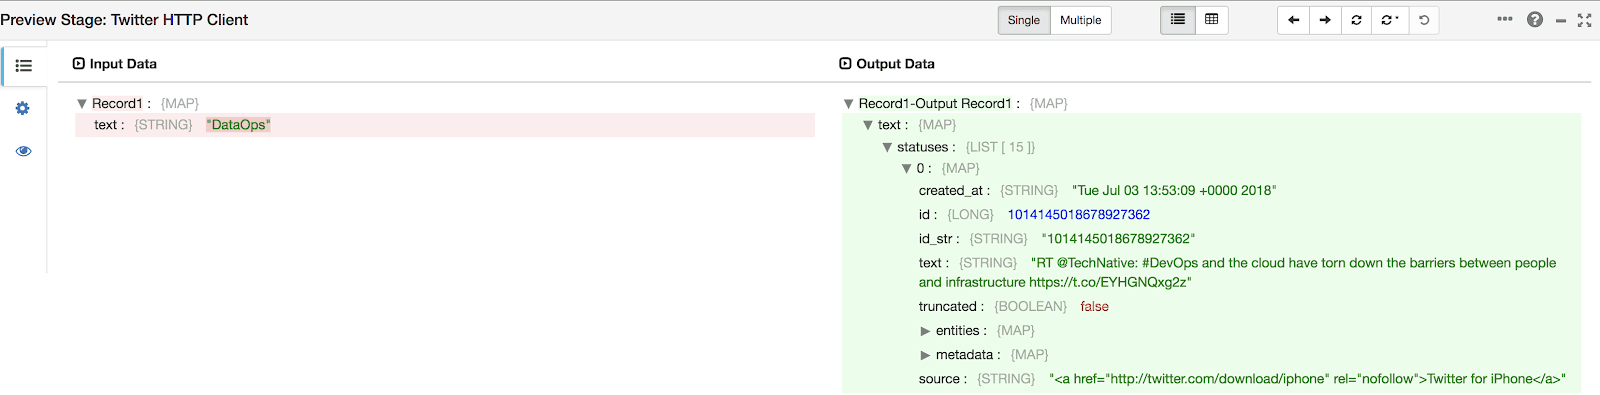
After looking at the HTTP response it’s clear that we need a way to extract the tweets from the list for further processing. Click on Preview again to return to designer mode.
Part 2
Now we’re ready to add more stages and continue building our pipeline. But before moving on, click on the link connecting HTTP Client Processor and Local File System and hit delete. This is because additional stages mentioned in the steps below will be added in between HTTP Client Processor and Local File System.
Here’s what our pipeline should look like now before proceeding.
Step 5: Add Field Pivoter Processor
This will enable us to extract tweets from statuses list in the HTTP response.
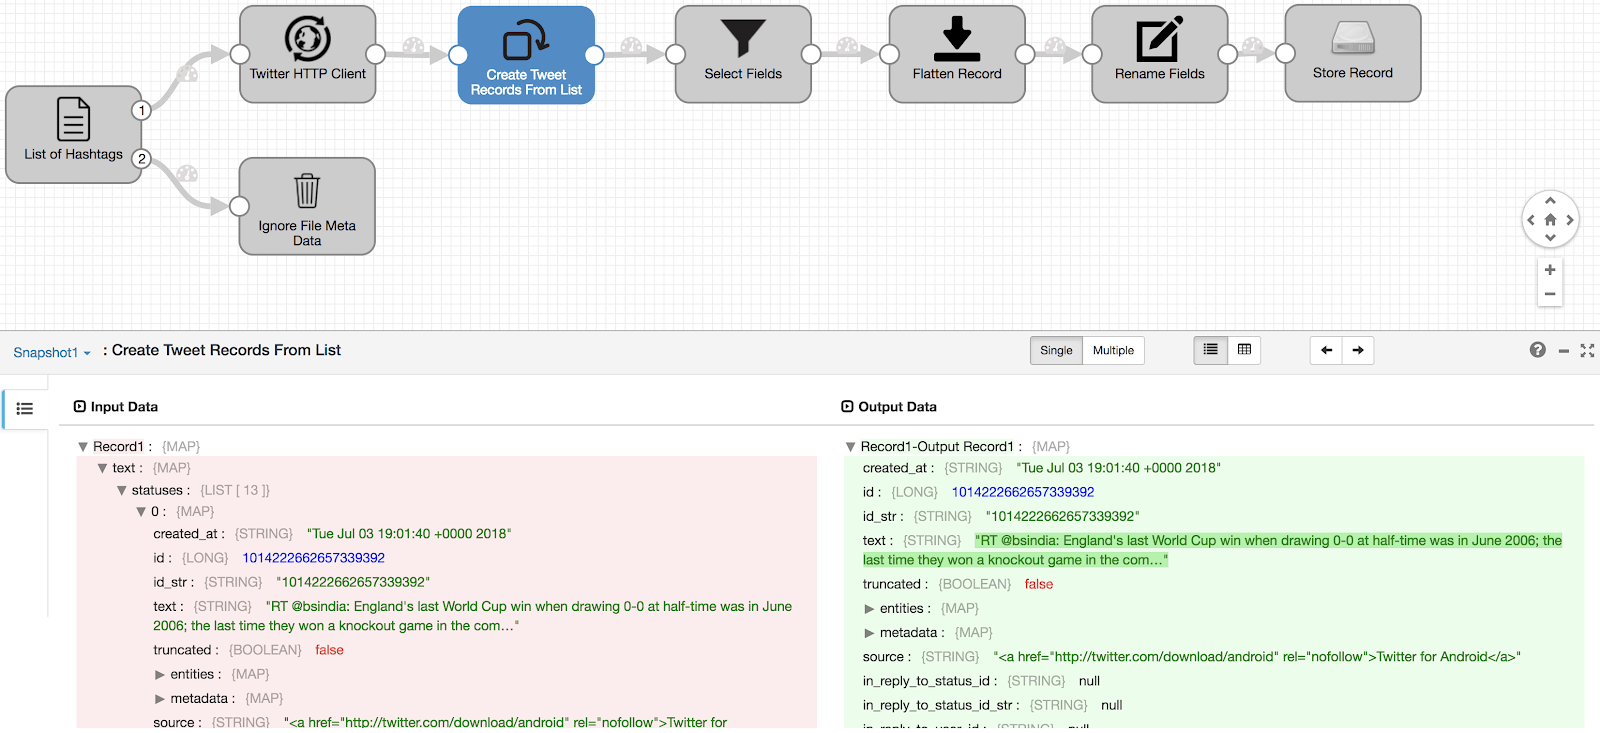
- – Under ‘Field Pivot’ tab enter ‘/text/statuses’ for ‘Field To Pivot’ and uncheck ‘Copy All Fields’ checkbox. Click on Preview to make sure individual tweet records are being created from statuses list.
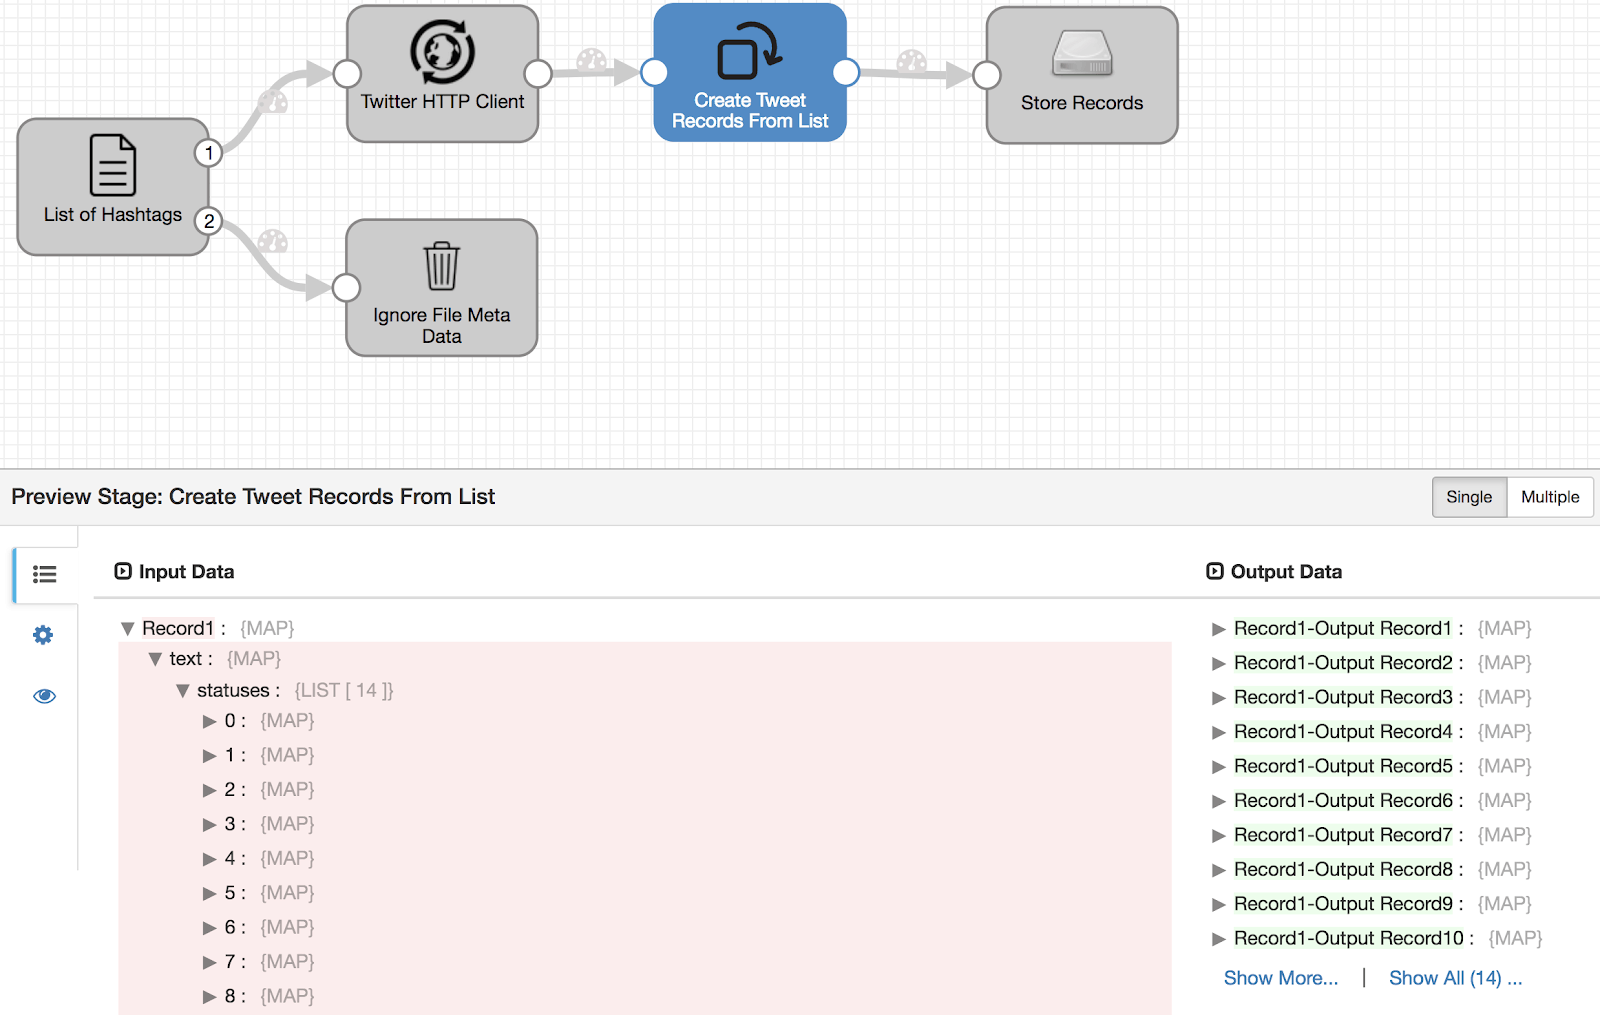
As shown on the left there are 14 tweets coming in nested as input to Field Pivoter and the output of this processor on the right are 14 records — one record per tweet. Sweet!
Now let’s add the following stages to clean, format and extract information of interest — username, screenname, text, geo, coordinates, and created_at.
Step 6: Add Field Remover Processor
This will make it easy for us to select only those fields that we are interested in as our final output.
- – Under ‘Remove/Keep’ tab select ‘Keep Listed Fields’ and select ‘/text’, ‘/created_at’ ‘/user/screen_name’, ‘/user/name’, ‘/geo’ and ‘/coordinates’ one at a time for ‘Fields’ (Note: click on ‘Select Fields From Preview Data’ link to select fields from sample/preview record.)

Step 7: Add Field Flattener Processor
This will convert the nested user fields in the Twitter HTTP response into ‘user.{attribute_name}’ format at the top record level. (Note: Keep default settings.)
Step 8: Add Field Renamer Processor
This will rename ‘user.name’ to ‘user_name’, for example.
- – Under ‘Rename’ tab enter/select ‘/user.name’ for ‘Source Field Expression’ and ‘/user_name’ for ‘Target Field Expression’
- – Click on + and enter/select /’user.screen_name’ for ‘Source Field Expression’ and ‘/user_screenname’ for ‘Target Field Expression’

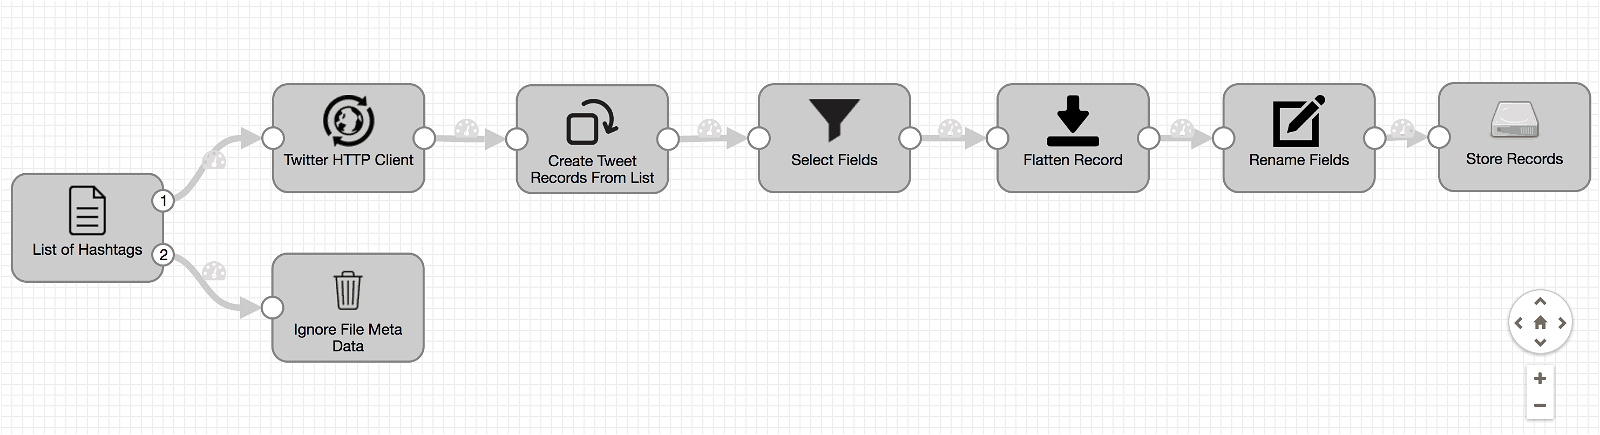
Final Pipeline – Take a Snapshot
Here’s what our final pipeline looks like.
That’s it! Although, before executing the pipeline it’s always a good idea to validate syntax and configurations of all the stages. Click on Validate and make sure we’re good to go.
Now we’re ready to ingest tweets in real-time. Click on Start.

In a few seconds you should see data/tweets starting to flow.
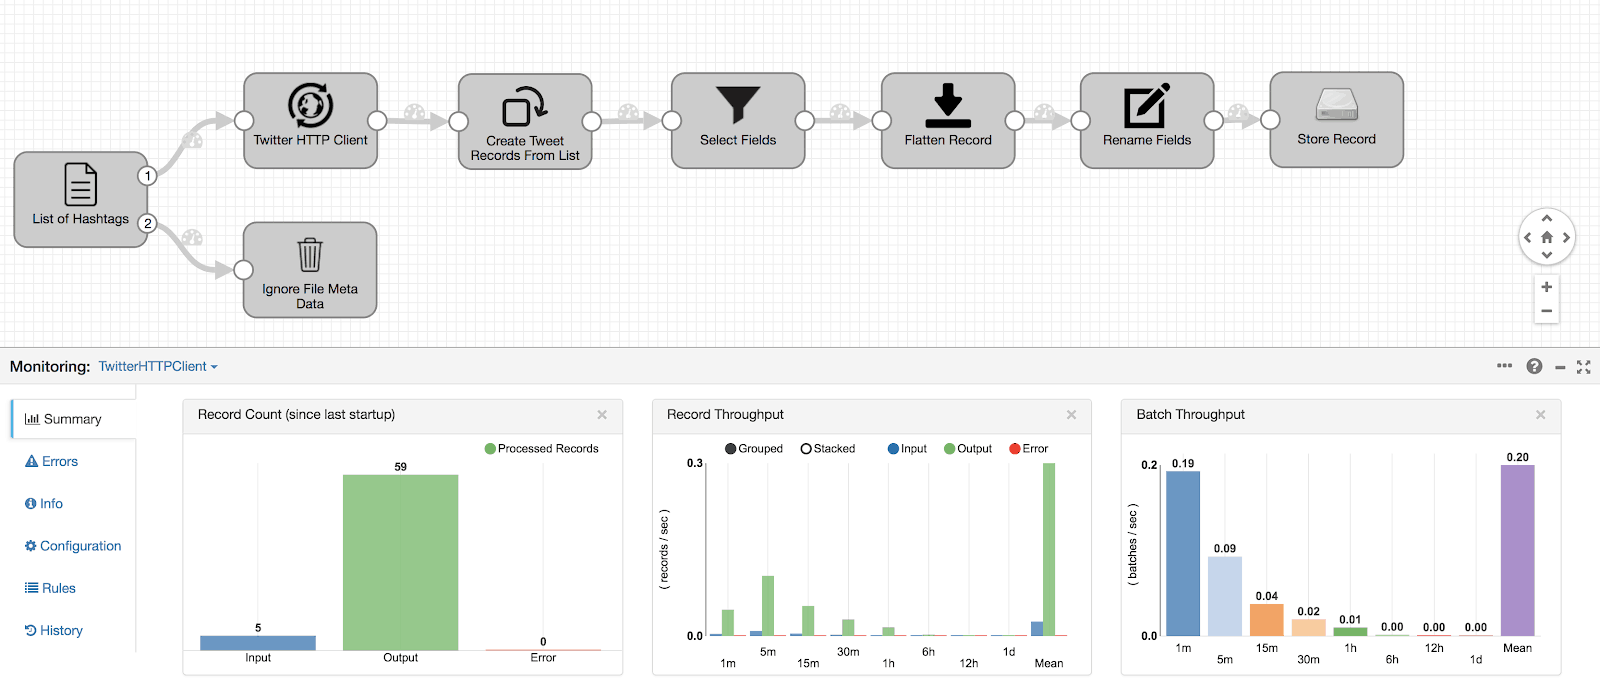
In the bottom pane is a summarized view (health, state, performance, etc.) of the pipeline as well as of the individual stages. To view the actual data flow in real-time as it moves through a pipeline in every stage or across stages, click on Snapshots.

In the popup window, click on Capture Snapshot. Once the snapshot is created it will get listed as shown below.

Click on View to examine how the pipeline is processing data through various stages. In the bottom pane you can also verify each record to make sure data is being transformed as expected. Click on HTTP Client Processor.
Besides reviewing data transformations in real-time, another reason why you might want to create and download snapshots is to use production data as input/source for pipelines in other environments for developing, debugging, and testing purposes. This can be very beneficial in cases where certain behavior is highly correlated with patterns in data that are hard to replicate outside of production environment.
Optional
While the pipeline is still running, add new hashtags in hashtags.txt file to see new tweets being processed through the pipeline without changing anything else.
Summary
The real value of modern big data analytics is realized by leveraging the StreamSets DataOps platform to enable data team members to access data from a range of sources and provide granular access as well as insights into data transformations in an on-demand and timely manner.
If you are interested in learning more about StreamSets, visit our Resource Finder.
StreamSets Data Collector is open source, under the Apache 2.0 license. To download for free and start developing your data pipelines, visit Download page.